Pedals, click systems (SPD and others), toeclips and other methods to keep your feet on the pedals
To come/updates:
- 2024-1-13: More experiences with the Ergotec EP-1 which seems to have been available for at least 8 years.
- 2023-11-4: Start of test of the Ergotec EP-1 large platform pedals which Ergotec calls medical pedals due to helping against numbness and giving more comfort
- 2023-4-4: Added a section on shoes: Do you need cycling shoes with stiff soles?
- 2023-2-27: Overhauling the bearings on the Shimano PD-EF205, which also means my conclusion for these pedals has changed as I don't like the small ball bearings and that overhaul was needed after 1.5 years.
- 2023-2-25: Review of the Union/marwi SP-890 with sandblock surface.
- 2023-2-25: Update of the Shimano PD-EF205 which has a large grippy surface.
- 2023-2-25: Added table of contents.
- 2021-11-5: Short review of some old pedals: VP 192 (city bike pedals).
- 2021-10-29: Short review of the pedals I've been using the last 2 years: Union SP-2160 (cage pedals)
- 2021-10-29: How to disassemble pedals.
- 2021-10-29: Short review of some old pedals: VP 191 (city bike pedals).
- 2021-10-21: What else I may test: The Look 'City grip' and 'Trail grip' pedals look interesting with big surface area and replaceable surface section.
- 2021-10-21: Addition about click systems being better for recumbents/velomobiles
- 2021-10-21: Some updates of my test of the Shimano PD-EF 205
- 2021-9-22: Coming test: Shimano PD-EF205: A pedal with a large surface area for use with normal shoes. I will compare it to cage pedals and standard city bike pedals for how well it works in removing fatigue that you will otherwise get with softer shoes, and I will see how well they grip various types of standard shoes (soft and hard soles, different materials). The issue with cage pedals and platform pedals with pins is that they give generally good grip but damage your shoes, so perhaps this is a good alternative.
Contents
In square brackets links to reviews of pedals that are not or may not be available any more.
- Overview of the systems for keeping your feet on the pedals :)
Bare pedals, pedals with cleats, pedals with clips + straps that you can attach to various pedals, pedals with power grips, pedals with half clips without straps.
- All the listed pedal types with clips, half clips etc. compared, in a video (youtube) + update video
The PD-EF205 with big grippy surface is shown in the update video, the Union SP890 with sandblock surface is in the latest video (not directly linked yet).
- Types of pedals
- Idea for a different type of strap system
- Do click systems or toe-clips help you go faster by pulling on the pedals?
- More on pedalling efficiency: cycling on the ball, heel, centre of the foot
- Do you need cycling shoes with stiff soles?
- Reviews of various pedals
- Short review: Union SP-2160: cage touring/MTB pedals
- Review: Shimano PD-EF205: large surface area city/touring bike pedals
- Review: Union SP890, daily use/touring, with sandblock surface
- [ Review: Old pedals: Shimano XT cage pedals, ca. 1991: sport, touring, mtb ]
- [ Review: Old pedals: Shimano DX cage pedals, ca. 1992: sport, touring, mtb ]
- Short review: VP 196: cage pedals: sport, touring, mtb
- [ Short review: Old pedals: Wellgo WPD 982 cage pedals, year?: sport, touring, mtb ]
- [ Short review: Old pedals: VP 191: plastic + rubber (well, soft plastic) grip, city bike pedals ]
- [ Short review: Old pedals: VP 192: plastic + rubber (well, soft plastic) grip, city bike pedals ]
- [ Short review: Old pedals: Sakae SR 150: Cage pedals (with asymmetric top/bottom) ]
- [ Short review: Old pedals: Sakae SR 350: Cage pedals with reflectors beneath the pedals (with asymmetric top/bottom) ]
- [ Short review: Old pedals: Shimano PD-T780: Cage pedals with reflectors and cleat system on the other side
- How to disassemble and reassemble pedals
Overview of the systems for keeping your feet on the pedals :)
I've been using standard pedals (where the grip for your shoes comes from the rubber section of the pedals) on my city bike up to when I studied at university, then I went to cage+clips+straps, then a brief period of using cage-only pedals, then SPD clipless + cage other side a few years ago, then cage + half clips, and finally in Aug. 2018 back to cage pedals, where the grip comes from teeth on the pedals, not rubber, but essentially I'm back to where I started!
What I wanted to compare and what I had not seen before was the different solutions (to keeping your feet on the pedals) and if and how they might be better than another type. This depends on use, I'm not interested in racing, so I don't really need to be secured to my pedals to avoid situations where I lose contact in difficult situations. For me more important, and this is important too actually in racing (especially MTB in difficult situations) and touring, is ease of getting off the pedal if there is something that keeps you there. For example with a bike trailer I don't ride fast and sometimes you can get stuck behind a tree root sticking out, loose tiles or getting up some curbs. For mountain biking (which I don't do but I can imagine the issue being really the same) getting stuck is also likely to be an issue and there a lot of people have migrated towards pedals with pins for grip, instead of using clipless systems such as SPD.
2021-1-21: Addition about click pedals for use on recumbents/velomobiles: For these types of vehicles a click system is better than the other methods due to your feet being up to about at the same height as your body, which means you will need to exert some effort to keep your feet up with pressure on the pedals, for this friction is needed so your feet don't move off the pedals but also pressure onto the pedals doesn't work well when the other foot is pushing so you need to either apply force that you should not need to apply (i.e. force that serves no purpose in propelling you forward) or you need to counteract gravity to keep your leg up and in the right position for when you go push with that leg again the next half cycle. This is especially so for 3 and 4 wheeled vehicles in which falling over is generally not an issue, and in velomobiles you are, compared to on a standard bicycle, fairly well protected in a crash which means avoiding falling over is not much of an issue for several reasons.
2023-2-26: Since using the Shimano EF205 large surface area pedals and then finally the Union SP-890 sandblock pedals, these are my fgavourites. But how long will they hold up? I used the Shimano XT cage pedals for ages, 15 years or so, an estimated absolute minimum of 50,000 km and they held up perfectly. How will the grip surface hold up on these pedals? So far, after almost 1.5 years, there is almost no wear on the pins of the EF205.
All the listed pedal types with clips, half clips etc. compared, in a video (youtube) + update video
- Bicycle pedals compared: Cage, cage with clips or half-clips, cage with power grips, clipless
After this video my test bike with the half clips was stolen, so I decided to try cage pedals without clips, and I think I will stay with these for now.
- Updates: Pedals, grips, bells, and Brooks soft springs (this includes the EF205 large grippy surface pedals).
- Link to come: Experiences with the Shimano EF205 + bearing service, and the Union SP-890 which has a sand block' surface (like a file, rough surface, very grippy).
Types of pedals
Pictures to be added. (or see the videos :) )
- Pedals with a rubberized grip, symmetric (bottom/top): This works well for city bikes, easy to get onto, and off of. A problem can be the grip in the rain, your foot may slip off...
+ Good for commuting with normal shoes so that these shoes don't get damaged!
- Cage pedals (or pedals with pins sticking out that serve the same purpose as the serrated edges on cages): Using nothing but the cage the annoyance is that usually only one side feels nice to ride on, and has enough grip. The pedals usually don't sit in a preferred position (as with toe-clips, see further on) which means you must look and turn the pedal the right way up.
Sept. 2018: I've been using the Union SP-2160 which are a bit bigger than other cage pedals I used so far, and symmetric top/bottom.
- A problem with cage pedals is that the soles of your shoes can get damaged, esp. with leather shoes. For commuting perhaps the best option is to use cage pedals with stiff cycling shoes (which makes your feet less fatigued, not needed for say 10 km rides, but on longer rides you will start to notice the difference), then change shoes at work, and ditto for the reverse journey.
- Cage pedals with toe-clip and straps: The weight of the toe-clip makes the pedal go almost upside down. The way to get into the pedal is then to stick one foot in one pedal, start riding with your other foot on the bottom of the other pedal, then turn that 2nd pedal with a flick of your foot upside down such that you can slide your foot into the toe-clip while riding. This takes some getting used to! I used this method for many years, it's quite useful, secure, for almost any situation.
- 2018: Cage pedals with half-clips: You can buy these ready made or take plastic toe clips and cut off the part from the middle, to the part which has the holes for the straps. You use these then without straps and I find them to work well, no straps means this is the safest to use in cases of getting stuck or when going up curbs) while at the same time giving guidance on where to put your feet. This is useful e.g. when using a bike trailer that might get stuck from a branch or tile sticking out. When my test bike was stolen in Aug. 2018, which had pedals with half clips that I made from full clips, I decided to go to cage only. Further see below my idea about using these half clips with straps. I've not tried that yet, but perhaps it's an option. I don't know when I will get around to try it, but if you already tried it, let me know.
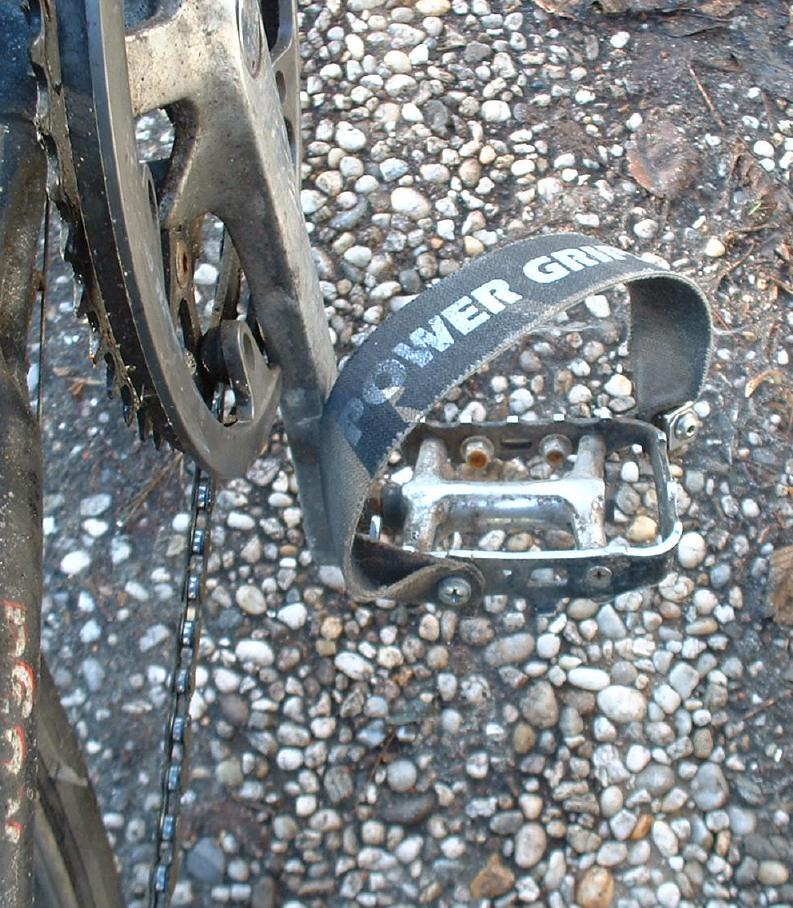
- Cage pedals with power grips:

Supposedly better/easier than toe clips. After using it for a while I could feel there was pressure on my knee joints. This is logical, as you must turn your foot to tighten the strap, but that means a force is being generated the other way. It's hard to get your foot in the right way (in exactly the right position) and I didn't like the feeling I got in my knees so this is a poor alternative to toe-clips.
- Click system for shoes that you can walk fairly normally with: There are 2 variants, dual side SPD (or other click system, some are even 4 way) or one side SPD with the other side being a cage pedal: The disadvantage of the SPD+cage pedals is that you must rotate the pedal in a direction dependent on which type of shoes you are wearing. Dual SPD pedals are for mountain biking or road biking (though other systems with bigger cleats are better for use on a road bike) and mean you can't ride easily on that bike with normal shoes, but you can walk if needed with those special shoes, which is useful for when you encounter a section where you must step off the bike, and thus this system was intended for mountain bikes. I like to use my bikes with bicycle shoes and normal shoes, so I would choose cage/SPD dual pedals then. As to being able to walk normally on shoes with SPD cleats: Not quite, there's always some grinding on tiles as they are almost flush or stick out slightly from the rubber. A problem I had lots of times is that the bolts can get loose by themselves or the reverse, they get stuck so much from rust that it's almost impossible to remove them without destroying something. So you need to use thread lock on the bolts but some issues with the bolts will remain such as the heads deteriorating after a long time due to walking with them on stones and due to the amount of water the bolts see. The plate inside the shoe can also rust away... I'd like to see bigger diameter bolts...
- Click systems with large cleats: For road bikes there's no real alternative for most people (if you actually race or if you ride fast and over varied terrain), though I found cage pedals + toe clips work just as well for me (for me it was the latter case, e.g. to go to the left of the tarmac and go over the grass to overtake if people don't move out of the way quickly enough).
- platform pedals with a large area (2021): There are pedals without gaps in the middle, such as the Look city grip, Shimano PD-EF205. I like the EF205, they give good grip (also in the wet, despite what some reviews state in various places) and they cause less fatigue in your feet though for me that is a marginal issue. The softer your shoes, the more important this aspect is.
- Platform pedals with sandpaper or sandblock surface (2023): The grip is excellent, they should work well when it is wet, I will see about that in the rain. Will they wear down the bottom of your shoes?
Idea for a different type of strap system
I initially wanted a system different than straps or cleats, because of riding with a bike trailer a lot past 2 years and that can get you into more problematic situations such as the trailer's wheel getting stuck behind a tree branch at low speed and you can then easily fall unexpectedly and not clip out or not get your foot out of the clip in case of clip+straps. So half clips was an idea that I then used, and I liked it, but it doesn't give the fixation that straps give. So another idea was then to add straps through the half clip, so that the strap goes over a bit more than the nose of the shoe. That should give a better hold, also to the left/right, and you should be able to quickly get out of it, far more easily than a full clip+straps. This is at the moment only an untested idea. How well the strap threads through depends on the type of half clip, on the opening it has. Perhaps another way to fixate the strap in place at a certain distance is also possible, a bolt perhaps (e.g. inner-hex with round head) drilled through the clip and the strap?
Do click systems or toe-clips help you go faster by pulling on the pedals?
My experiences say no, unless you put a lot of effort into training your pulling muscles. Try this for a while: Ride on your bike only by pulling up. You will almost certainly not be able to go fast nor do it for a long time, without getting an uncomfortable feeling in your legs. I've seen some results of measurements (I think it was a mid-late 1990s issue of Bicycling (magazine from the USA), but perhaps a later issue of some german magazine, I need to think a bit about it) that show it's not much of an advantage even for professional cyclists. Another consideration is that you will not even have any advantage at all if your leg muscles are more developed than your lungs...
In my view click systems are mainly useful in transferring power effectively (no needing to adjust your foot position), and in feeling secure, but not in providing more power and thus going faster because of pulling. Note that pulling is also possible with toe-clips...
More on pedalling efficiency: cycling on the ball, heel, centre of the foot
I mentioned bicycling magazine above, and another article that I remember for sure from that magazine, an issue in the mid-late 1990s, is about pedalling with a higher positioned saddle than is usually recommended, which if you don't rock your hips (which is bad), will force you to extend your foot and thus use your ankle muscles. This seemed to have worked (letting cyclists put out more power) and I tried it at the time, but found it for my purposes not to be useful, as I don't race. This becomes interesting in relation to a claim of better bicycle pedals, the 'Catalyst one', from 'pedalinginnovations.com'. I saw this pedal in a video on youtube not long ago in which it was advocated to pedal with the pedal positioned in the middle of the foot.
Now I will come to the part where I start to analyse: This is not something new, children in school often do this, and has been done for ages. I've been used to cycling on the ball of the foot and I tried such things (also to pedal on the heel of the foot) and didn't really like it. Perhaps it is just getting used to it, I may try it out for longer.
What I want to discuss is some arguments used on that website for why this makes sense, which are not good arguments. Such as the reason to cycle on the ball and yet you need stiff soles in cycling shoes whereas you don't need that with weightlifting.
First weightlifting is done only with brief high loads whereas cycling is done with long duration (even if not continuous) lower loads. Note that runners don't use stiff shoes, so in principle soft soled shoes should be possible for cyclists without problem... I think an issue here is people experiencing fatigue in the feet, which as a runner you are far more trained in...
Secondly: the weight is mostly on the heel, not the ball so that's why you don't need stiff shoes as only a small load gets through the arch to/from the ball of the foot. The ball is mostly for stabilising.
Third: That the ball is used for sprinting (and even long distance running) points to why it makes sense for cycling, due to short term but long duration in total loads. The point of 'use your ankle muscles' also points to more options being available when riding on the ball of your feet.
Still it is possible that for most purposes riding on the centre of your feet could be useful. I will give this a try with the PD-EF205 and the SP-890.
The pedalinginnovations pedal measures: 143mm long, 95 mm wide, which is 4.7cm longer than the PD-EF205 and 5.6 cm longer than the SP-890. They are pricy, at $149 per pair.
Do you need cycling shoes with stiff soles?
I've cycled distances of around 100km multiple times on a standard bike with 3 speed Torpedo hub, and perhaps 2 x ca. 150km trips with my cross bike too though perhaps that was when I had already bought cycling shoes, before I had cycling shoes and I never had a problem riding long distances on a bicycle (while riding with the ball of the feet on the pedals).
At some point I bought fairly stiff cycling shoes, probably later than 2006, but I don't remember exactly when, and I did notice less fatigue in my feet when doing longer rides, but it was more the difference between not riding much for a long time, and then riding a long trip which made this noticeable. This first pair was either from Aldi or Lidl. I should have the receipt somewhere... I later bought a replacement pair from Lidl due to the soles of the first pair breaking. Many years later I had this same problem again with that 2nd pair but more on that further. These shoes from Lidl in size 44 fit perfectly. I used them with SPD pedals and with cage pedals. About 3 years ago one of the shoes had a broken sole, then ca. middle of 2019 the sole of the 2nd one of this 2nd pair of cycling shoes broke too and I started looking for new cycling shoes. I ended up buying the SH-XM9 second had to try out in 2020, these are more boots, for winter/bad weather. For this purpose I like them, they excellent in the cold and rain to keep your feet warm.
An issue with shoes as always is sizing, well, I bought them in size 45 which is good with thick winter socks, too large otherwise. I normally have size 44 so that makes sense, but due to issues such as shoe width you can never tell whether a pair of shoes fits you or not, especially with Shimano...
I had at that time already decided to no longer use SPD pedals so I use these shoes without SPD. Then in 2021 I bought the Shimano ET-5 cycling shoes which are meant for e-bikes, which means they are meant for flat pedals. This means that the soles are stiffer than most daily use shoes but not as stiff as road bike shoes. Also they don't have a hole in the shoes for the SPD bolts, which is where water can come in when walking through puddles, which you do have with SPD shoes. There are sealing kits for SPD shoes but I wasn't going to be using SPD pedals any more so why bother with that? These SH-ET5 were size 45 and these turned out to be too small, or rather the nose is too narrow which means effectively they are too small. Since that time I used my hiking shoes, Meindl Siena. These are for hiking and are slightly stiffer than some normal shoes, but they are not very stiff. I used these shoes on many 100km+ tours and never had an issue with my feet getting tired.
In principle it can make sense to use stiffer soles: When cycling with the ball of your feet on the pedal the force to your sole where then the achilles tendon takes the force no longer needs to go through the arch of your feet.
When cycling with the ball of your feet on the pedal this still means a lot of force on your achilles tendon, so this is why cycling with the pedal in the middle of your feet makes sense, cycling on the ball of your feet is more like running where you do exactly the same thing.
So in this sense the cycling innovations 'idea' which is of course not their idea, it's been used for many decades before the research about this was started and before these pedals were even conceived, makes sense.
Cycling with the pedals position in the centre of your feet, preferably with longer pedals to catch the heel and ball of your feet, is more like walking. As most people ride as if they are walking and not sprinting, this makes sense for more relaxed riding even without knowing anything about where the power comes from, i.e. which muscle groups are used to propel yourself on a bike...
I want to try this more for a long period but using standard pedals.
For cycling on the ball of the feet longer pedals are also useful, as you then have more options to position your feet and to distribute the load.
My decision to not use cycling shoes any more came about not by choice but by not finding the right cycling shoes. I started using my hiking shoes and I felt no fatigue in my feet at all even on 100km+ trips. My suggestion: Forget cycling shoes, try good hiking shoes...
Reviews of various pedals
Older pedals that I used: old Shimano XT, DX cage pedals, VP 196 cage pedals, the recent Union SP-2160 cage pedals, then city bike pedals with rubber surface such as the VP191 with which the rubber top section gets a bit slippy in the rain, cage + SPD cleat-on-the-other-side pedals such as Shimano M324 (fairly heavy but work well), Shimano XT PD-T780 (almost the same as the XT PD-T8000, the latter has pins in the body for more grip). I used the PD-T780 for quite a while but sold them when I decided to no longer use any cleat system.
In new pedals to test (new as in: pedals that I tried since first making this page with the SP-2160 and PD-T780 having been the last pedals I bought, I think): After the Union SP-2160 which is a fairly standard cage pedal, I will start with the Shimano PD-EF205, which has a large surface area which should help distribute the force among a larger area of your shoe, which should give less fatigue in your foot when riding longer distances.
In future I am not going to be using click pedals any more, as I don't think there is any point for touring and definitely not for city use.
Reviews of fairly recent pedals
Review: Union SP-2160 cage touring/MTB pedals
Specifications:
Mass (2 pedals): 333 g
Width of surface area: 8.9 cm
Length (direction of motion): 7.7 cm
Available in black and silver.
Price: Ca. EUR 23,- (in 2023)
I had been using these since 2019 for 2 years until I took them off my daily/touring bike in September 2021 in order to put on the PD-EF205 pedals, and then I noticed play in the pedals. This was due to a dry running sleeve bearing (on the inner side, i.e. near the crank), which was solved by putting in new grease, the same fix as with the VP-191. See the section How to disassemble pedals on how to do this for sealed bearings and for cup and cone bearings.
These pedals have small unit (sealed) bearings on the outside, I think they are the same as in the VP-191 (695ZZ).
These pedals worked well for me, never any issues. The reflectors are pressed on onto the outside through the holes that can be used for clips, which are more prone to getting damaged than where recessed (obviously). I have pedals (taken from bicycles that I upgraded, that were ridden by others) where the plastic holders attached to the pedals were damaged and the reflectors were gone, and 've not lost any reflectors on these pedals, but one of the holders on these SP-2160 pedals is damaged a bit.
Review: Shimano PD-EF205: large surface area city/touring bike pedals
Specifications:
Mass (2 pedals): 2 x 296g = 592 g (including reflectors)
Width of surface area: 9.6 cm
Length (direction of motion): 9.6 cm
Bearings: Cup and cone inner side + outer side: 2.38mm (5/32), inner side 14 pieces, outer side 16 or 17 pieces.
Available in silver, black, blue, red.
Price: Ca. EUR 30 to 45 (in 2023)
Tested from ca. 2021-9-23:
They are pretty heavy but that's not a problem for me. The surface area is quite big, with plastic pins that give grip. The large area means they should result in less fatigue in one's feet when riding with standard shoes with soft soles (so, not with cycling shoes with stiff soles).
I bought the Shimano PD-EF205 to try out platform pedals with a large area. I noticed these while looking for a few things I needed for my bike and had a look at reviews. This one for example: https://cyclingtips.com/2021/09/spotlight-shimano-pd-ef202-and-ef205-casual-flat-pedals-review/, which was positive enough to confirm it would be good to compare these pedals with the other pedals I use and have used in the past (I have most pedals listed on this page stored in a box as reference material, same as I do with lighting etc.).
[ Notes about that review:
1. The review states : "Finally, a durable pedal for casual cycling." and "Thankfully even if you don’t service them then the build quality and bearing sealing offered is still a big step up from almost every other comparable pedal I’ve seen in this category.". This is of course nonsense. There are plenty of good quality pedals for casual cycling, many of the types have some kind of rubber or sandpaper surface are good in quality of the bearings and seals. For example the Wellgo C318RB. All city bikes in the Netherlands come with these types of pedals, and plenty of them have good bearings. I do agree with the article that Shimano pedals are generally quite good in having very good bearings and seals. However, after 1.6 years the bearings/seals are not as good as say those of the early 1990s Shimano XT cage pedals which never needed service in many years. The ball bearings were rusty in one pedal and there was play in both pedals.
2. The review states: "to easily service these pedals you’ll likely need Shimano’s own pedal cone adjustment tool (TL-PD300)": No, you just need 10 and 13 mm sockets which are useful for many other purposes.
]
The reflectors are a separate kit, they should have been mounted as standard. I bought the reflector kit too but these are actually standard Cateye RR-1 with some plastic bits that are already mounted on the pedals, so if you have 4 spare Cateye RR-1 reflectors (which you could take off of old pedals), you don't need this kit.
I've been riding mostly distances up to 10 km, then e.g. doing some grocery shopping, then back home again, and for such distances I didn't yet experience an improvement in less fatigue in your feet when wearing soft soled shoes I will let a relative try them out for a while then try them again.
2023-2-25: Finally an update: My relative really liked these pedals on a pedelec. Normally pedals don't stand out but after riding a few weeks with these pedals she remarked that she really likes the feel with a good grip (similar to the pedals that came installed on her new ebike recently, which have a sandpaper type surface which are also excellent in grip).
I also like them, on short rides and on long rides. I used them mostly with my hiking shoes so far. They are quite secure even in the rain in contrast to what some reviews state. Any slipping on these pedals is more likely about the soles of the shoes used, as some shoes can get quite slippy when they are wet (e.g the Shimano SH-XM9). The improvement over other types of city pedals is small but good grip and slightly less issue of fatigue in your foot makes it a good pedal, and compared to cage pedals there is no pressing feeling in the area where your shoes touch the cage.
2023-2-26: I noticed play on the spindles, so I'm taking the bearings apart and putting in new grease...
The bearings are loose ball bearings on both sides, which is unusual as most pedals have a sleeve bearing near the axle. The ball bearings on that side are rusty and where they run on the axle as well. Not good! The ball bearings are tiny 2.38mm (3/32) balls, also not good! Why so small? I don't have new ones so I reused the old ones.
The left hand pedal had play but didn't have rusty balls. The grease was black so some pollution had taken place. I put in new grease and adjusted the pedal to have no play.
see below for adjusting these pedals
After this overhaul of the bearings I'm less impressed with the PD-EF205. I don't like the small ball bearings, that some were rusted, nor that I needed to re-grease them in just 1.5 years! This changes my view of this pedal: I was thinking of buying another pair as a spare, but won't now. I will keep using them on my touring bike and the SP-890 on the other touring bike, to see how well they each hold up.
I had a look for these bearings and saw Shimano bearings in a package with 62 pieces ((14+17)x2 = 62, so on my left hand pedal there was 1 ball missing...) and further that you can buy 316 (A4, salt resistant) stainless steel 3/32 balls, I will buy the latter and replace the chrome balls next time I open up the pedals.
Review: Union SP890: daily use/touring, with sandblock surface
Specifications:
Mass (2 pedals): 516 g
Width of surface area: 10.1 cm
Length (direction of motion): 8.7 cm
Bearings: Inner side sleeve?, outer side: cup and cone: 14 balls, ball size 2.38mm according to the packaging
Available in many colour combinations; silver (aluminium) + gray sandblock, silver + black sandblock, black + gray sandblock, black + black sandblock, matte black + gray sandblock, matte black + black sandblock.
Price: Ca. EUR 26,- (in 2023)
Tested from 2023-2-25:
The right hand side of the pedal was heavy going, so I popped out the dust cap, then adjusted the bearings (cup/cone, fixated with 2 nuts, 9 and 11 mm, see at the end of the page on how to loosen the 9 mm nut). I like the grip of these pedals! I chose the black ones with gray sandblock surface which look quite nice. If they had been available in red that would be even better. I like black or a colour that stands out but which still looks nice in combination with esp. black and silver, which is why I bought the EF205 in red.
To service the bearings you need to pry off the cap instead of unscrewing it with a outer nut (such as the VP 196) or inner hex shape (VP-2160, SR 150, SR 350) at the end, which is annoying.
It is not possible to combine these pedals with half clips, unless you are prepared for some DIY such as adding a spacer block where the front reflector is placed, and drilling holes to fix the half-clips.
After trying these pedals which are fairly low priced, I feel that sandblock pedals or pedals with large surface with a rough surface (from plastic pins in case of the Shimano EF205), are generally much better than any cage pedals [ Exception: If you want to mount clips+straps or half-clips. ].
Possible issue: I didn't look closely at the size of the balls when I adjusted the bearings on the right hand side pedal, but according to the packaging the balls are 3/32 (2.38mm), the same tiny balls as in recent Shimano pedals. I will check this next time I open these pedals. In any case, I had a look and you can buy 316 (A4, salt resistant) stainless steel 3/32 balls, I will buy those and replace the chrome balls next time I open up the pedals. I don't know what the issue might be in longevity from high pedal forces as stainless steel is less strong than standard hardened steel but that's for a future test.
Review: Ergotec EP-1: daily use/touring, with large size and large grippy surface
Specifications:
Mass (2 pedals): 346 g
Width of surface area: 9.2 cm
Length (direction of motion): 13.2 cm
Bearings: Inner side sleeve?, outer side: cup and cone: How many balls?, ball size ??
Price: Ca. EUR 44,- (in 2023)
Tested from 2023-11-4
Manufacturer's page: https://www.ergotec.de/en/products/pedale/sub/city-trekking-pedale/produkt/ep-1.html.
These pedals can only be mounted with 6mm hex keys, not a pedal wrench, which is a bit annoying but at least in this case they made the pedals a bit closer to the crank by doing that.
The bearings felt gritty so I loosened them on both pedals. Warm up the pedals to make the plastic a bit more pliable, put in a small screwdriver between the body and the end cap and pry the cap out. The use the description further on this page to loosen the outer nut first, then loosen the inner nut a bit then adjusting the cone and tightening the nuts again. I had to use 9 and 11 mm nuts from a 1/4 ratchet, those from a 3/8 ratchet set were too big...
These pedals immediately felt comfortable, which was surprising, but this is of course not the comfort change from not getting hot spots from pressure in specific areas which you can get with local pressure such as from cage pedals, nor not getting a tired feeling in the ball of your feet which comes from a too small support area and the muscles needing to keep the feet into their normal shape.
Update 2024-1-13: I've been using these in the Netherlands for a few months, mostly with my hiking shoes. I read in a review (this may have been on amazon) that these pedals are not grippy enough when using them with leather soled shoes, so with a hard sole. This may be true as there are many 'pins' which are just the plastic formed in such a way to have small 'pyramids' sticking out, and the plastic tips may not grip a hard surface well enough. I can't tell about this at the moment, that is for a later test.
I like the large surface area and the small ridge that makes sure your feet don't come too close to the crank.
I noticed recently that there are reviews of this pedal on youtube already 8 years ago, whereas I had the impression it was new. Perhaps from a 'expected stock date' at a distributor. In any case, I obviously overlooked this pedal, possibly because it didn't seem high quality with the plastic housing, but that does have the advantage of making them light weight!
I will need to have a closer look at the bearings after long use in rainy weather to see how well they are kept dry, but that is for later. So far I like them in use, I will update this page once I tried them with hard soled shoes.
Reviews of older pedals that are (likely) no longer available
Review: Shimano XT pedals, ca. 1991: sport, touring, mtb
Specifications:
Mass (2 pedals): 297 g
Width of surface area: 9.1 cm
Length (direction of motion): 5.9 cm
Black aluminium cage and silver aluminium body.
Bearings: sleeve bearing inner side, outer side cup and cone, ...check ball size...
Price: ? (in 1991)
No longer available, just as a comparison.
I used these pedals for many years, an estimated minimum of 50,000 km. I never greased them, they had no play, and the bearings are still perfect... (I have to note that on the bike on which these pedals were mounted I didn't ride often in rain or in winter)
These pedals do not come with reflectors, but reflectors or clips can be installed at the front. There are openings in the cage for straps for with a cage, which is how I used them.
The below listed Shimano DX cage pedals from the same era (ca. 1992, I got them on a Koga World traveller that I bought 2nd hand) are very much inferior, plastic body with riveted on cage, bad rubber seals that are quickly gone, heavy.
Review: Shimano DX cage pedals, ca. 1992: sport, touring, mtb
Specifications:
Mass (2 pedals): 406 g
Width of surface area: 9.3 cm
Length (direction of motion): 6.4 cm
Black steel cage and black plastic body.
Bearings: ...check...
Price: ? (in 1992)
No longer available, just as a comparison.
I used these pedals for a few years on a 2nd hand touring bike. The rubber protection for the bearings is gone. I think I took out the axles to grease the bearings many years ago, but in any case that is difficult as there is not an opening straight to the nuts to loosen them, as there is no opening in the steel cage, and the cage can't be removed as it is riveted to the body, which means fiddling to insert a nut and remove them to take out the axle and/or adjust the bearings.
These pedals do not come with reflectors, but reflectors or clips can be installed at the front. There are openings in the cage for straps for use with a cage.
Conclusion: Poor in quality of seals and in serviceability. In use it is a standard cage pedal which works well.
Short review: VP 196: sport, touring, mtb
I don't have them any more so not sure what the exact measurements and the size of the cartridge bearing are.
Size/mass from specifications:
98 mm wide, 64mm long
274 g per pair, including reflectors.
Price: Ca. EUR 20 (still available in 2023)
I used these perhaps 5-7 years ago. They are still available, each has a sleeve bearing + a cartridge bearing (possibly 695ZZ but not sure).
You can access the bearing by unscrewing the plastic end cap which has a hex outer shape to use with a socket.
There was some play in the bearings after a few years, don't recall whether I took these apart and re-greased the sleeve bearings or that the play came from the cartridge bearings. The issue for me is that I felt these pedals were too small, and I switched to the SP-2160.
Short review: Wellgo WPD 982 cage pedals, year?: sport, touring, mtb
Specifications:
Mass (2 pedals): 332 g with 2 retroreflectors (each pedal 1 retroreflector)
Width of surface area: 9.3 cm
Length (direction of motion): 10.2 cm
Silver aluminium cage and black plastic body.
Bearings: ...check...
Price: ? (year?)
No longer available I think, just as a comparison.
These pedals came mounted on a Cannondale touring bike that I bought several years ago. These are standard pedals, not remarkable in any way. I opened them up to adjust the bearings and put in new grease. The cage can be removed for this purpose as it is screwed onto the body. There was no seal at the axle end, so I added a little rubber from a piece of inner tube.
To service the bearings you need to pry off the cap instead of unscrewing it with a outer nut or inner hex shape (VP-2160, SR 150, SR 350) at the end, which is annoying.
These pedals can be used with clips+straps, and there are holes on both sides so you can use reflectors on both sides.
Conclusion: Poor in quality of seals, reasonable regarding serviceability. In use it is a standard cage pedal which works well.
Short review: old pedals that I came across: VP 191: plastic + rubber (well, soft plastic) grip, city bike pedals
2021-10-29: Short review of old pedals that I came across on a bicycle.
Specifications:
Mass (2 pedals): ? g
Width of surface area: ? mm
Length (direction of motion): ? mm
Bearings: sleeve (inside) + 695ZZ cartridge bearings
The ones I use are from an old bike, so a bit worn but still good. To start I took these pedals apart. They are (or were) available in versions with standard taper bearings with loose balls, and with bearing units 695ZZ (= 5mm axle, 13mm outer diameter, 4mm wide). The ones I have are with 695ZZ bearings, at least on the outer side, the inner side (near the crank) is a large sleeve bearing. See further on this page how to take pedals apart. The bearing on the inside had some play but that was minimal and no longer apparent after putting in new grease as they were almost running dry. The outside bearings were fine.
They could be a bit bigger, but they are ok. Slips a little when wet, but not problematic. It's mostly that I hear the sound of the shoes slipping or perhaps more slightly adjusting position, I never felt yet that my feet would slide off the pedals. This needs some more testing however, with various shoes. So far I only used my hiking shoes which I've been using since the demise of my Lidl bike shoes (sole was broken and more). I tried the Shimano Shimano SH-ET5 E-Bike shoes but despite a size larger than my normal shoes they were too tight (or rather: too narrow at the nose) and I sold them on. Using my hiking shoes which have a much softer sole than bicycle specific shoes was also the reason for me to try out the PD-EF205 pedals with a larger platform...
Short review: old pedals that I came across: VP 192, plastic + rubber (well, soft plastic) grip, city bike pedals
Specifications:
Mass (2 pedals): ? g
Width of surface area: ? mm
Length (direction of motion): ? mm
Bearings: sleeve (inside) + cup and cone, ball size?
2021-11-5: Short review of old pedals that I came across on a bike of a relative.
These are very similar to the VP 191. The difference is that these have clip on reflectors on one side, which means you could mount a half-clip on them... Rubber grip is the same as on the 191, not perfect when it's wet, your feet can slide off but it's usually not an issue.
These pedals use cup and cone bearings, there is likely a version with sealed bearings too.
[ Short review: Old pedals: Sakae SR 150: Cage pedals (with asymmetric top/bottom) ]
Specifications:
Mass (2 pedals): 187 g x2 = 374 g
Width of surface area: 9.9 cm
Length (direction of motion): 6.1 cm
Bearings: sleeve (inside) + cup and cone, ball size?
Reflectors can be installed front and rear. Or reflectors rear, clips on the front.
They are not that grippy as they have no real spike sections that grab onto your shoes, but in quality they are good.
I only have 1 left (which I use to compare to other pedals) as I mounted 1 of the SR 150 along with the other of the SR 350 on the bike that was stolen.
More to be added.
[ Short review: Old pedals: Sakae SR 350: Cage pedals with reflectors beneath the pedals (with asymmetric top/bottom) ]
Specifications:
Mass (2 pedals): ca. 220g x2 = 240 g [ the pedal I have left is 215 g, but is missing a reflector and metal plate behind it that holds the reflector and a bit of aluminium so a single pedal is at least 220 g ]
Width of surface area: 11.4 cm
Length (direction of motion): 6.0 cm
Bearings: sleeve (inside) + cup and cone, ball size?
I saw these for sale, new-old-stock, and thought they could be useful as you can use clips as well as the permanently fixed reflectors at the same time at the front. With other cage pedals you need to choose between reflectors at the front or a clip. I was wrong about them as the ca. 2cm extra below the pedal meant that on the first ride the front reflector was gone (from not keeping the pedal high enough in a curve). I then removed part of the broken aluminium cage. These pedals were not smooth running even when new, made in Japan. The bearings needed to be adjusted to be slightly less tight... In quality it looks fine otherwise.
As the 2nd pedal of the pair was on my stolen bike (which I mounted along with 1 pedal of the SR-150 pair to compare them) I didn't finalise the aluminium cage modification, which I wanted to do to possibly use these pedals further without the reflectors. I'm keeping the remaining pedal as an example of a bad design.
NOT recommended.
You could modify them and remove the reflectors but that seems like a waste of time unless you happen to have these pedals lying around.
[ Short review: Old pedals: Shimano PD-T780: Cage pedals with reflectors and cleat system on the other side ]
Specifications:
Mass (2 pedals): ?
Width of surface area: ? cm
Length (direction of motion): ? cm
Bearings: sleeve (inside) + cup and cone, ball size?
These are no longer available, replaced with the T8000 which has pins that you can screw to the desired height for grip.
These were fine but I got annoyed from time to time about needing to turn them over to get to the right side. Also as I found no real benefit to riding with cleats and having decided to only use pedals without cleats also for safety when pulling trailers (to transport things), I sold these. They were good but they didn't stand out as being better than standard cage pedals.
How to disassemble and re-assemble pedals
To remove the outer cap, if it is not screwed on, you need to put a screwdriver between the body and cap and pop it out. If that doesn't seem to want to go, try heating up the cap with a hairdryer or paint strip gun (on low, and be careful to not make the plastic melt!), which will heat up the cap and make it softer, i.e. more amenable to distortion to allow the screwdriver to go between the cap and body, and for the cap to pop out.
To remove the axle to replace the bearings or grease them:
Note that some pedals don't use no-turn washers, see the review of the Shimano PD-EF205 on how to deal with those.
- For pedals with taper (cup and cone) bearings with no-turn washer:
you need to remove the outside nuts between which is located a no-turn washer (which usually have a notch that fits in a groove in the axle to prevent it from rotating), with a socket (ratchet set), and a pedal wrench on the axle. These nuts are fixed tightening against each other and rotating left = unscrew. These nuts can have various diameters, the inner nut (cone nut) likely 13, 14 or 15 mm, sometimes a non metric size, the outer nut is smaller (ca. 11 mm, older pedals may use non metric sizes). The outer nut can get stuck so much that it's hard to turn at all, in which case you need to put a smaller socket with wrench or ratchet wench onto the nut, put the axle end on say a stone and give a small tap with a hammer onto the wrench attached to the socket to loosen the nut. Then turn it. I had to do this with 2 pedals I overhauled recently. You can then remove the washer and the nut, you can use a screwdriver to rotate the innermost (cone) nut, you don't need a special tool nor socket for that if you don't have that size. I would advise to buy a cheap ratchet set with sockets, these come in handy at various times for your bicycle or bicycle trailer.
For pedals such as the PD-EF205 without a no-turn washer:
There is a special tool for these pedals from Shimano, the TL-PD300/TL-PD400 which costs ca. 35 euros, but I found these not necessary. You just need 10 mm and 13 mm sockets (with a ratchet set), and a pedal wrench, and possibly a large screwdriver to secure the cone-nut.
There is a plastic insert for the bearings on the inside that you can pull out with say curved tweezers or curved pliers by sticking the nose behind this plastic into the cone section, then pulling. You don't need to do that to remove those bearings, I removed them with curved tweezers, but it will make it easier to clean out the old grease there.
There is not a no-turn washer between the cone-nut and the lock nut but there is some sort of thread lock on that nut so it is hard to take out. Once the balls are removed (14 inside, 17 or 16 outside, the left has 16 balls and unless I miscounted the right hand side has 17 balls), clean the balls, clean the inside with some toilet paper, put in new grease, put in the balls with curved tweezers and push them into the new grease. Now put in the axle.
- For pedals with fixed unit (sealed) bearings:
To remove the nut at the end, for the left hand side pedal rotate the nut to the left (counter clockwise), for the right hand side pedal rotate the nut to the right (clockwise).
To put back together the pedals
- For pedals with taper (cup and cone) bearings:
1. Screw on the cone-nut so that there is no play, then loosen it a tiny bit as tightening the 2nd nut onto it via the washer means the cone will move a bit towards the balls, from small play the nuts have on the thread
2. put on the no-turn washer,
3. put on the lock nut and tighten it,
4. (a) If the pedal is not running smoothly on the axle then it's too tight. In this case undo the outer nut just a little and again use a tiny screwdriver to rotate the innermost nut (cone nut) a little bit to the left to make it more loose, then tighten the lock nut again.
4. (b) If there is too much play undo the lock nut a bit, then rotate the cone nut with the tiny screw driver a bit to the right (closer to the balls), then tighten the lock nut.
Repeat steps 4 (a) and 4 (b) until the bearings are set with the minimum amount of play while running smoothly/freely.
For pedals with cup and cone bearings but no no-turn washer:
Screw on the cone so that the pedal axle seems to have no play, then screw on the lock nut.
Now to setting the nuts correctly for the minimal amount of play:
Experiment a bit in this way:
1. tighten the locknut, then if it's too tight (axle hard to turn), then loosen not the locknut but the inner cone nut. This makes these nuts to be locked against each other.
So, do not loosen the lock nut if the axle is hard to turn, instead loosen the cone which by doing this locks against the lock nut.
2. tighten the lock nut if there is too much play on the axle. The cone nut will be forced along with the lock nut.
So, do not tighten the cone if there is play, but tighten the locknut, as this forces the cone nut also closer to the balls and makes the lock nut tight against the cone nut.
You can also use a big screwdriver to lock between the housing and the cone-nut, so that it doesn't turn while screwing the locknut tight against it.
- For pedals with fixed unit (sealed) bearings:
Screw back on the the nut and tighten it. For the left hand side pedal rotate the nut to the right (clockwise), for the right hand side pedal rotate the nut to the left (counter clockwise)
Last modified: 2023-3-6