
Note that to make the lamp properly waterproof again you need to fill the mount with e.g. silicone or perhaps 2 component glue.
| [ Main index » Bicycle components tests » (Dynamo) bicycle lighting » Philips Saferide 60 review » Dissection and modifications of a Philips Saferide 60 | Dutch: NL: Deze pagina in het Nederlands ] |
I used a minitool with cutting disc:
Note that to make the lamp properly waterproof again you need to fill the mount with e.g. silicone or perhaps 2 component glue.
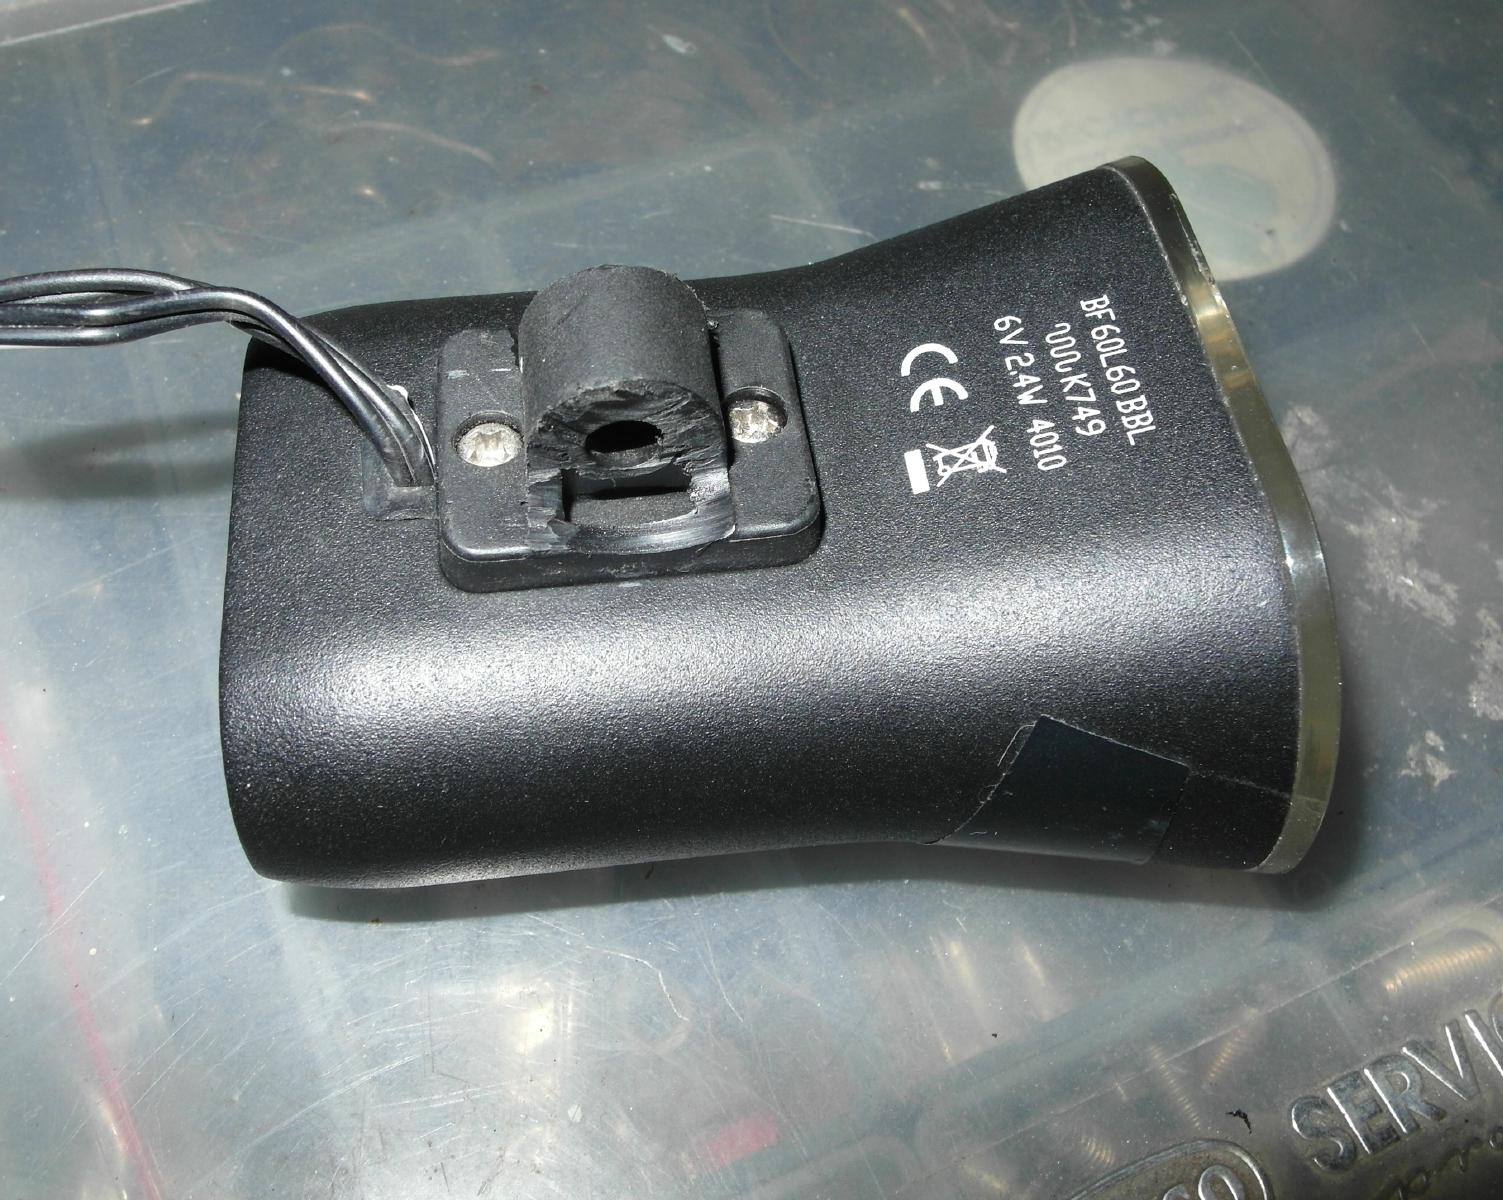
I also took off the retro-reflector which is glued together with the rear part so you need to put in a screwdriver and just force it off. It will not come off completely undamaged but you could glue it back together if you want. The retro-reflector part was undamaged.

See further pictures of this mounting board on my multiple headlamp mount page.
I opened the housing with a metal saw:
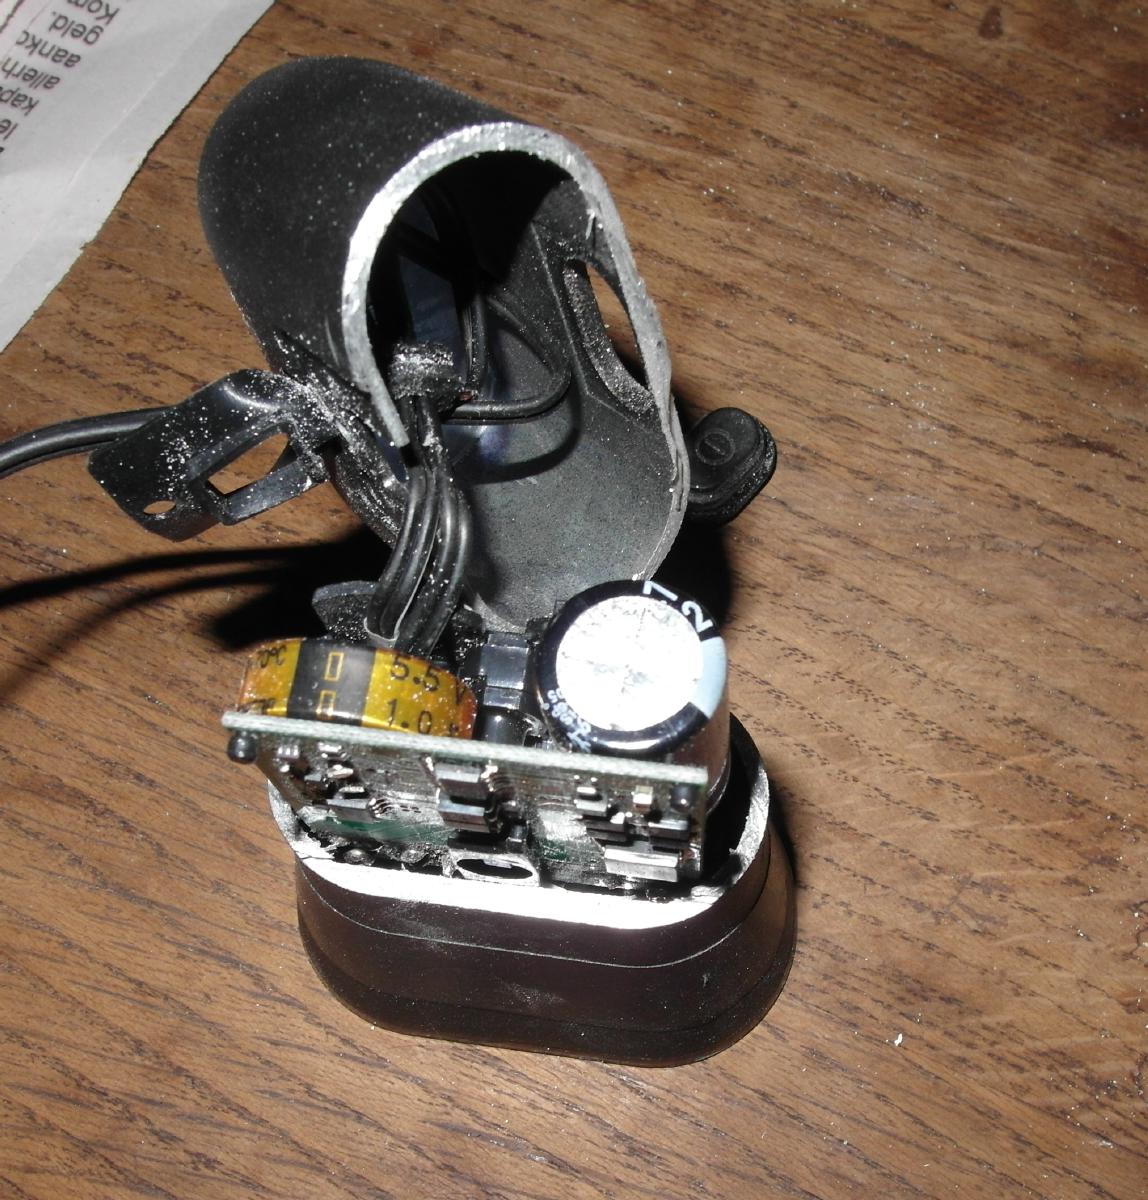
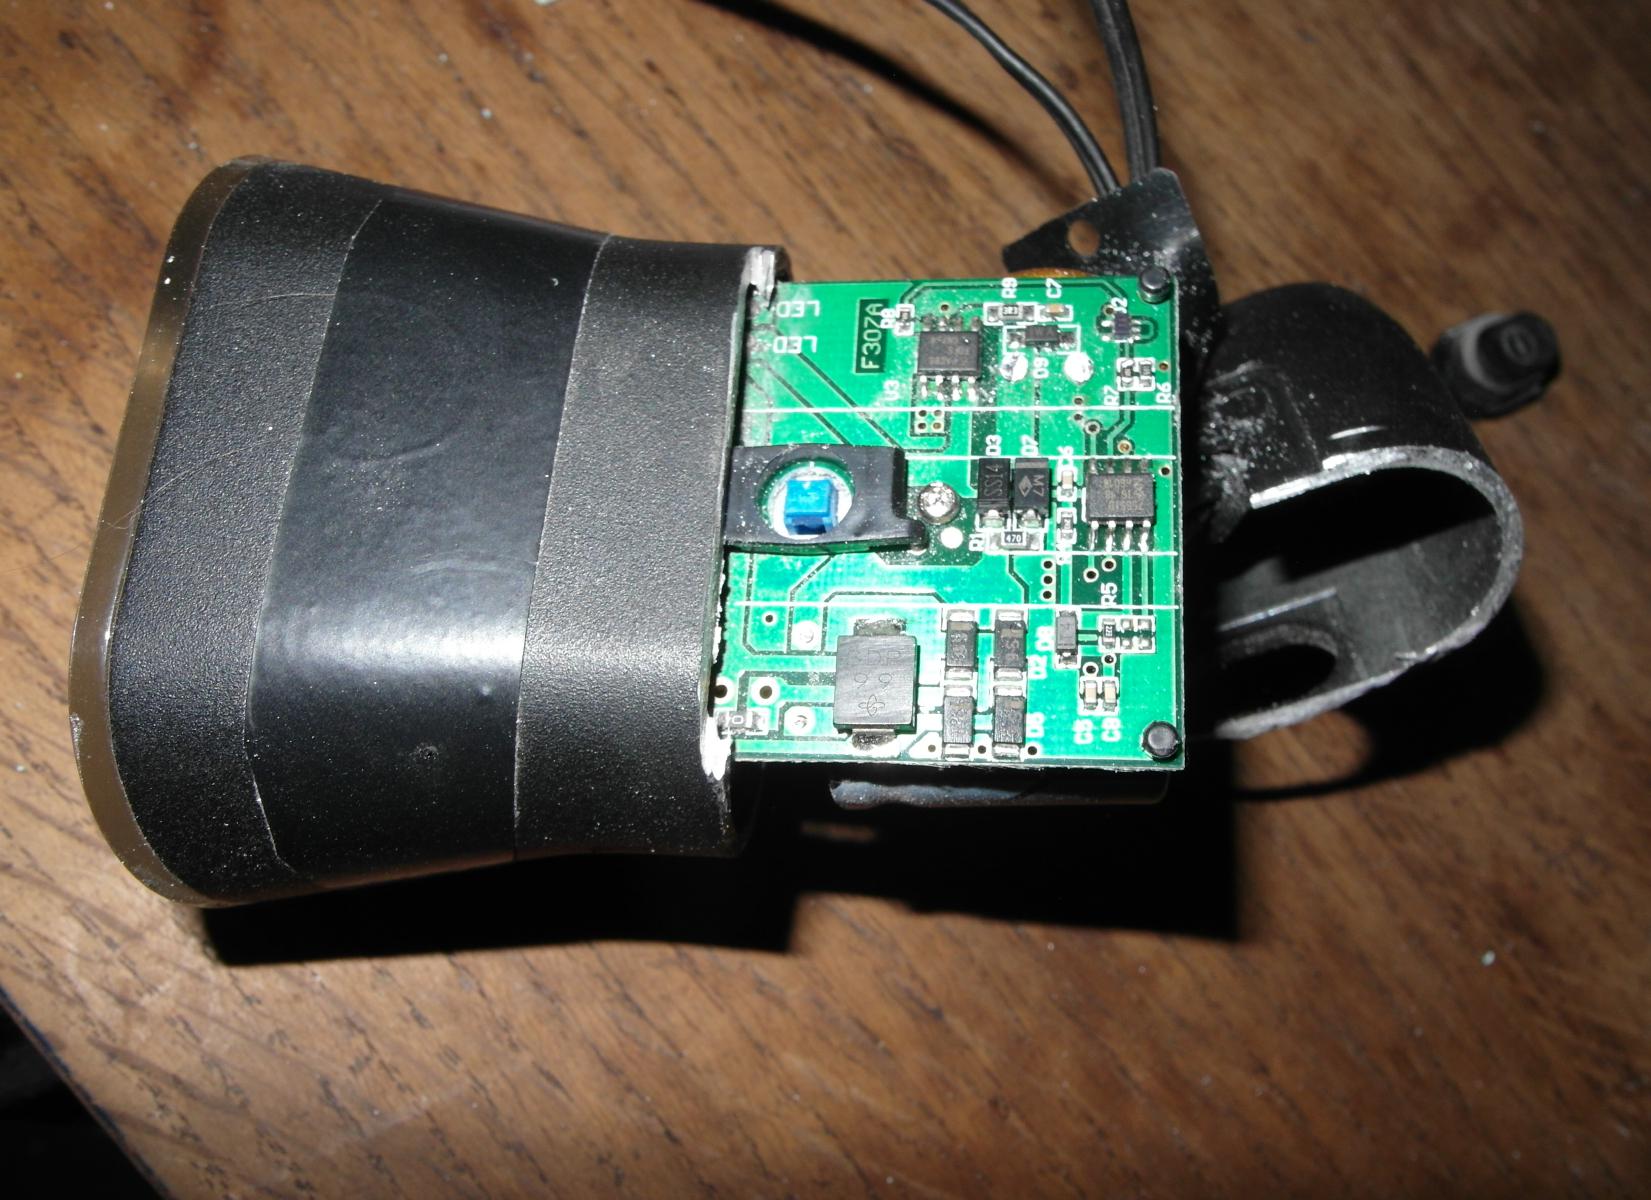

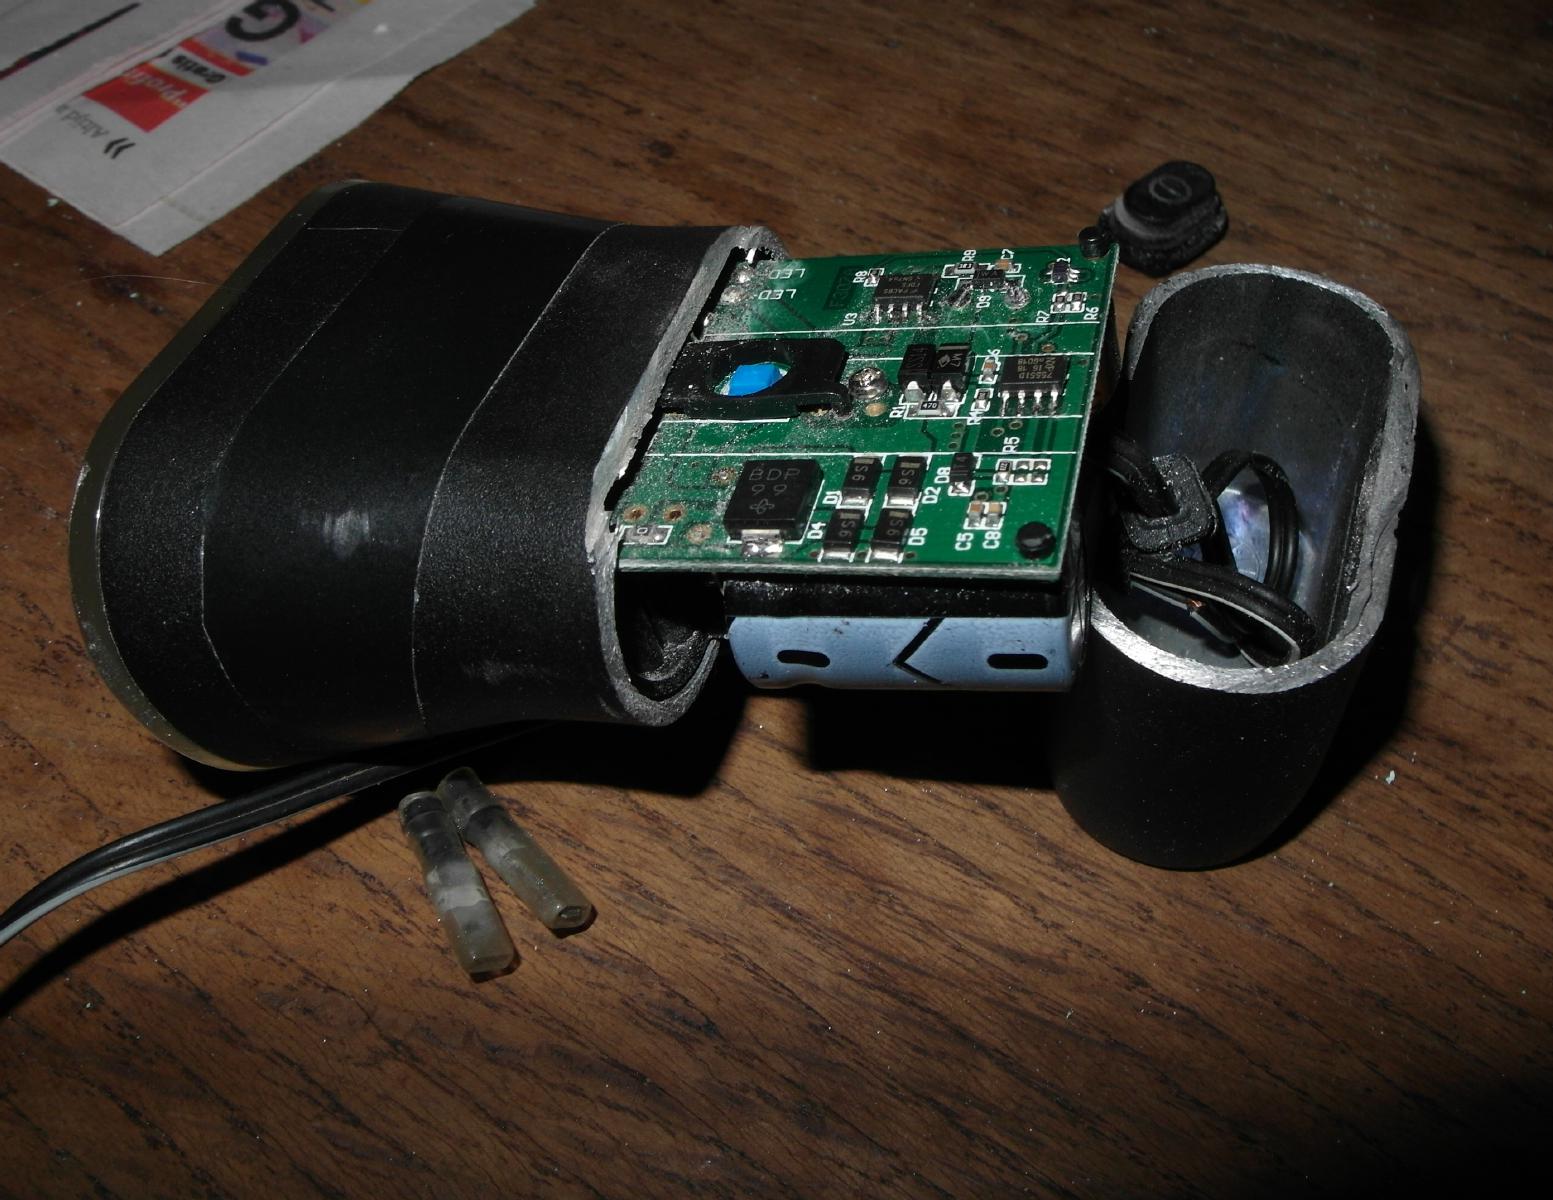
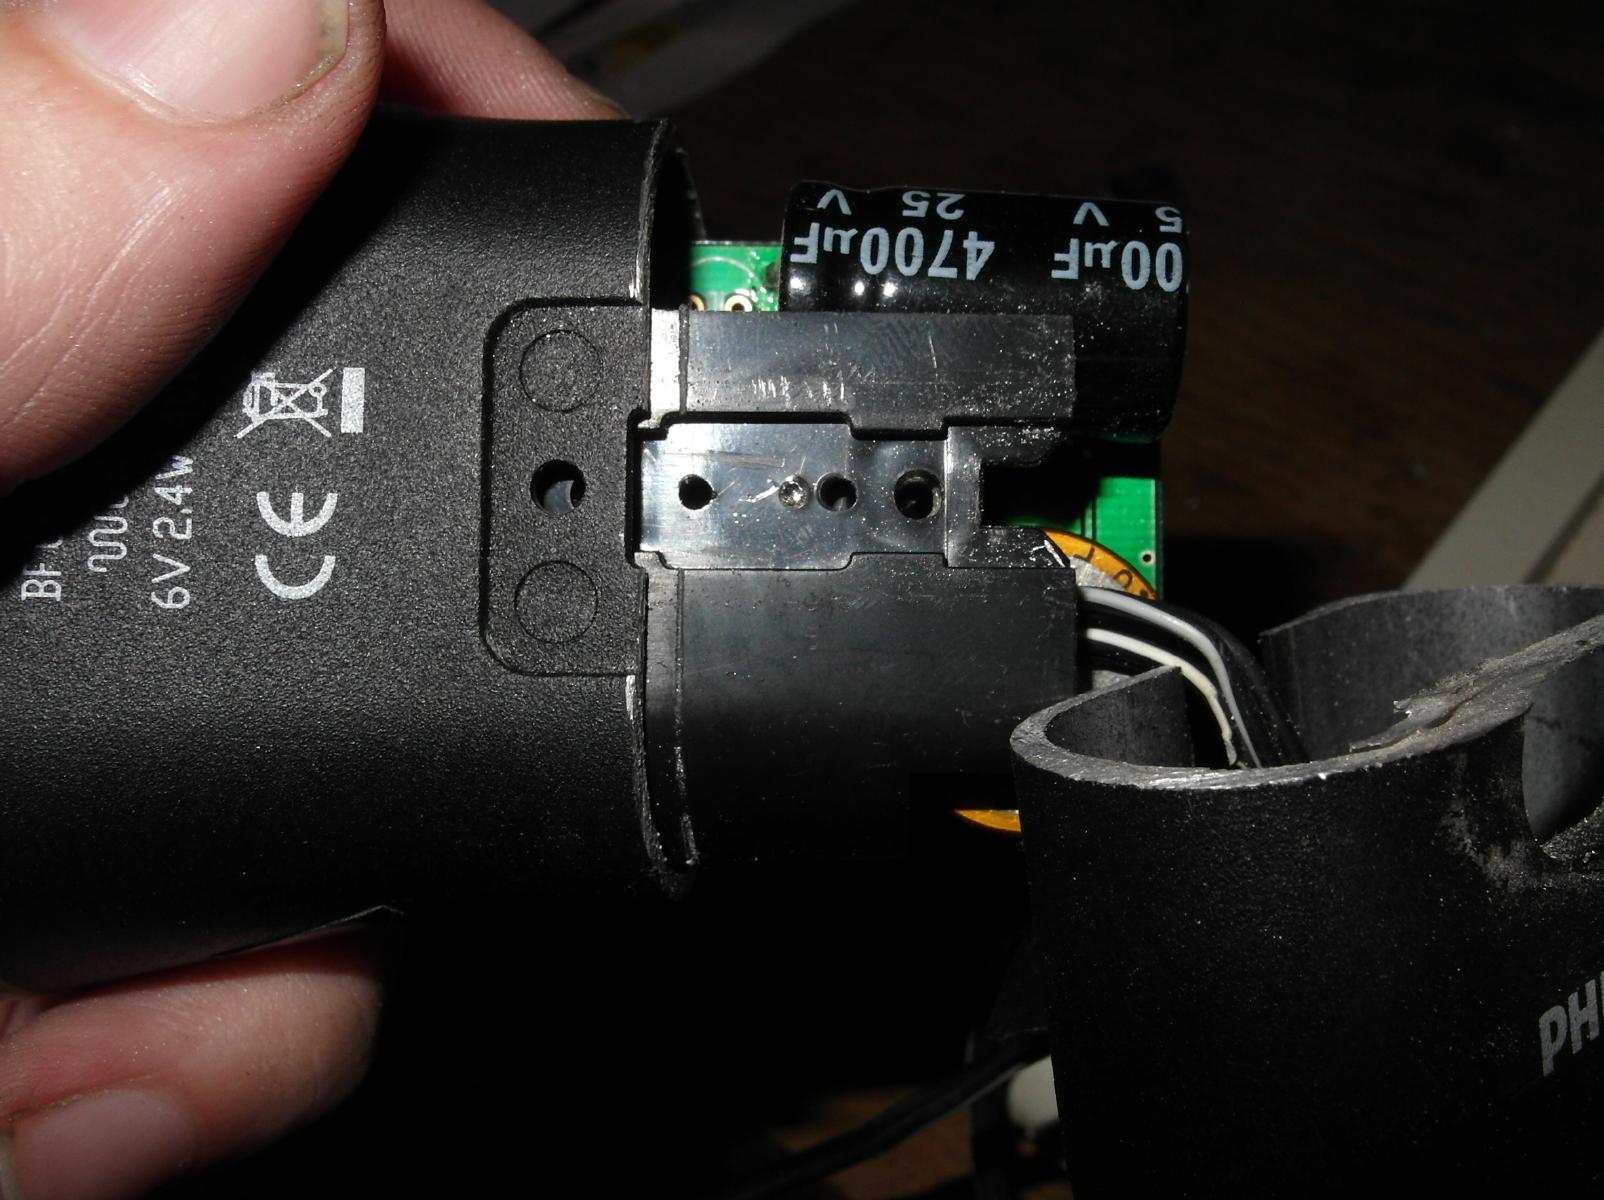
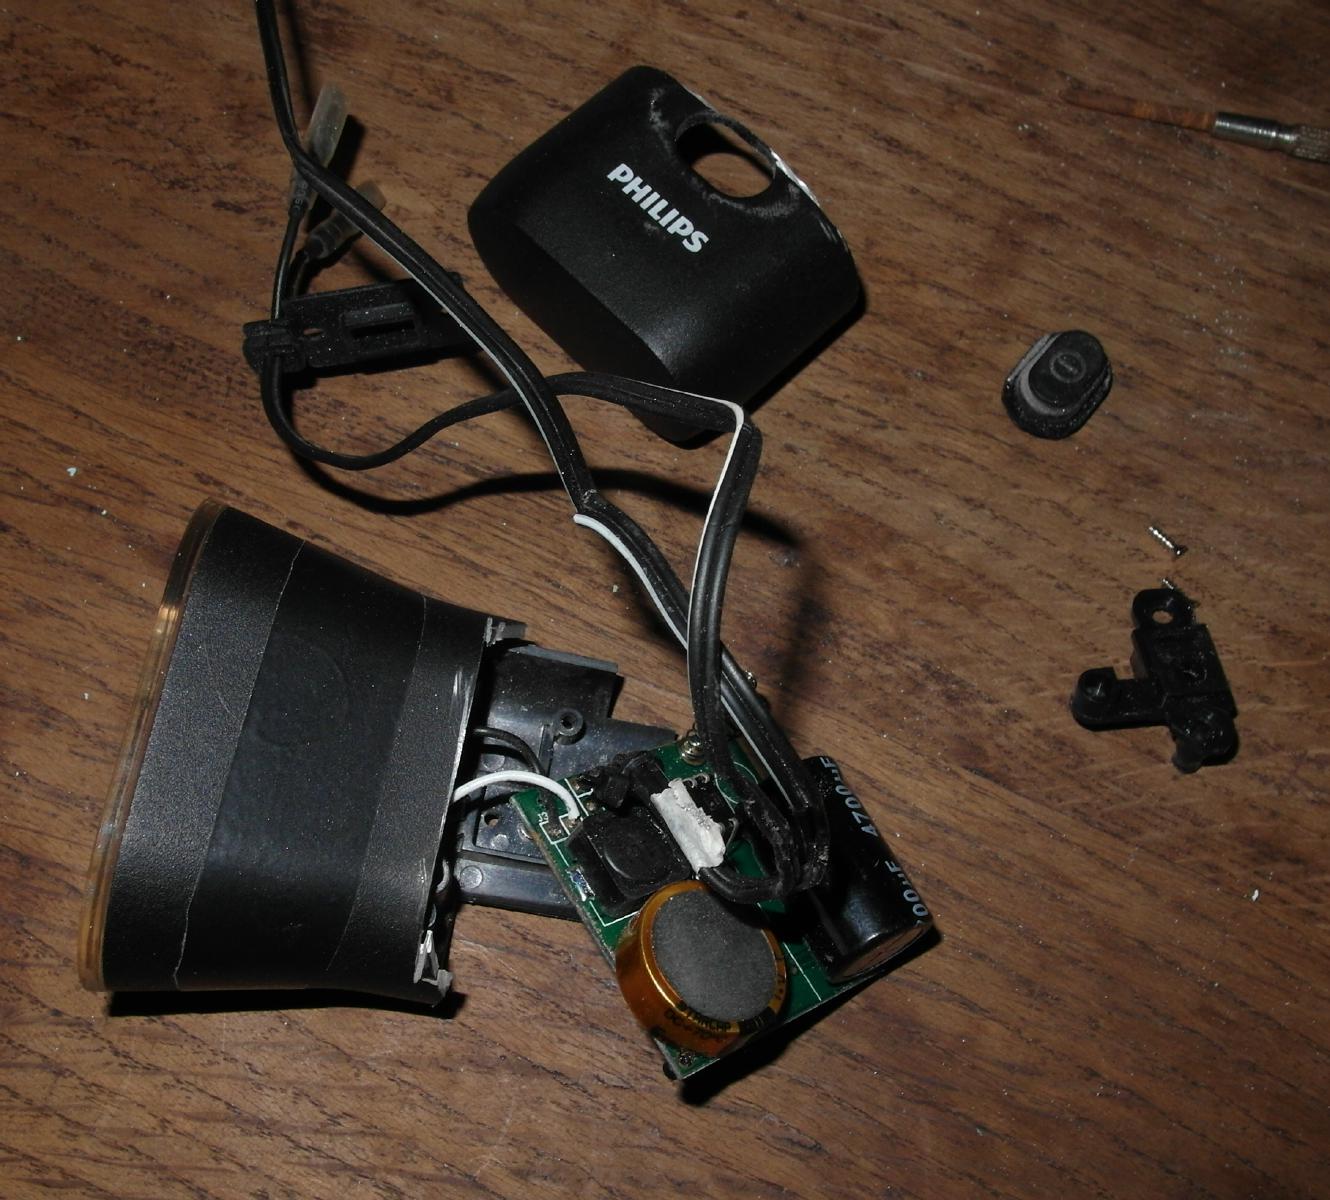
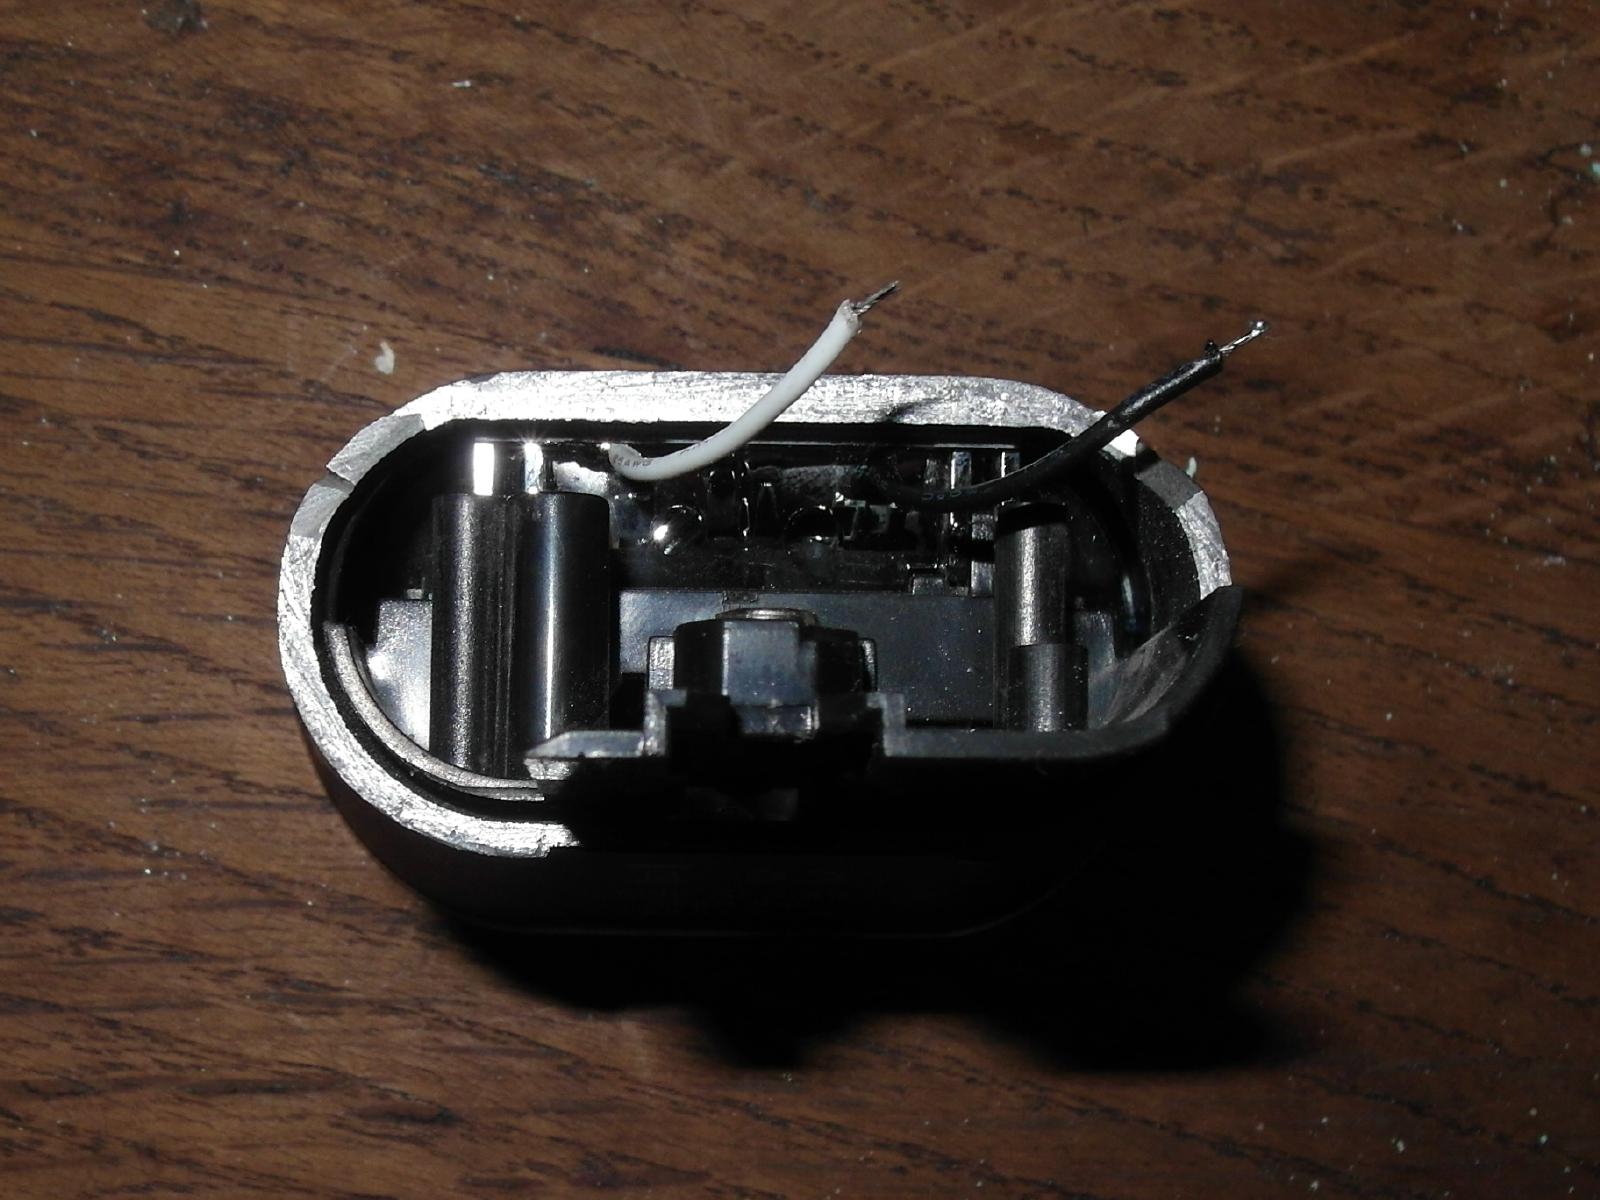
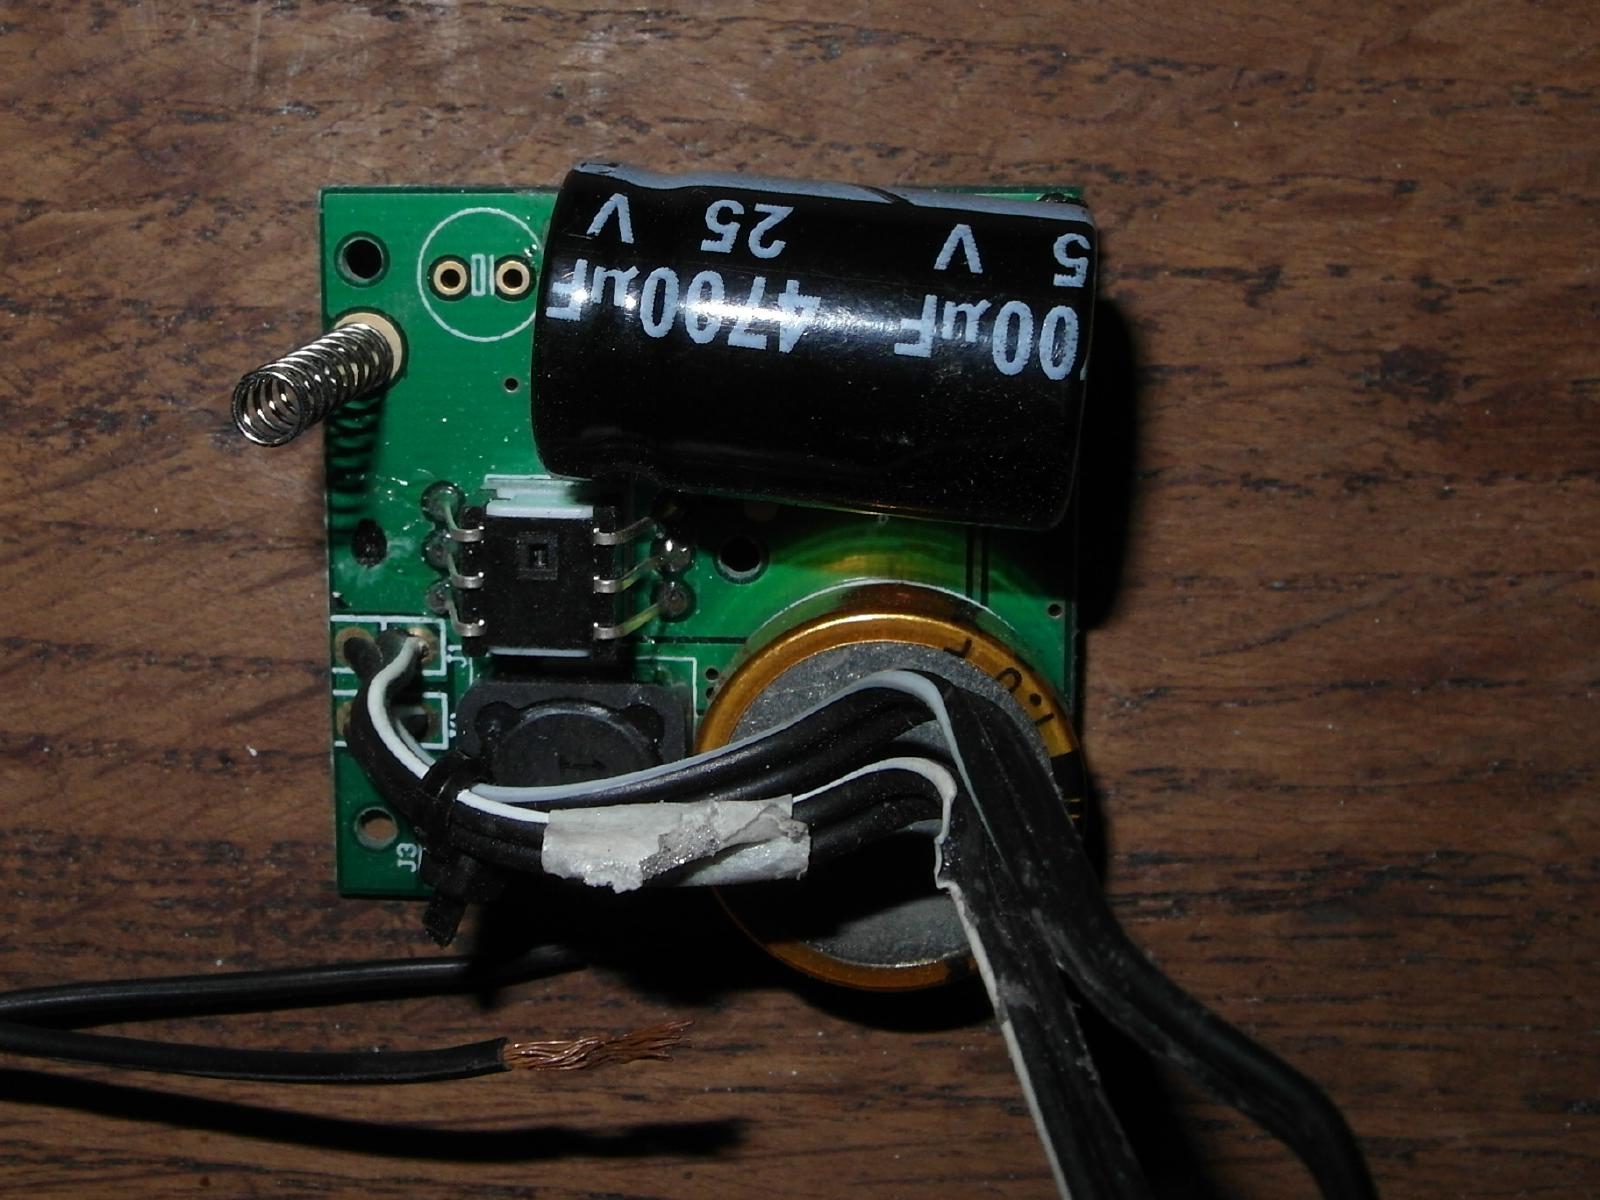
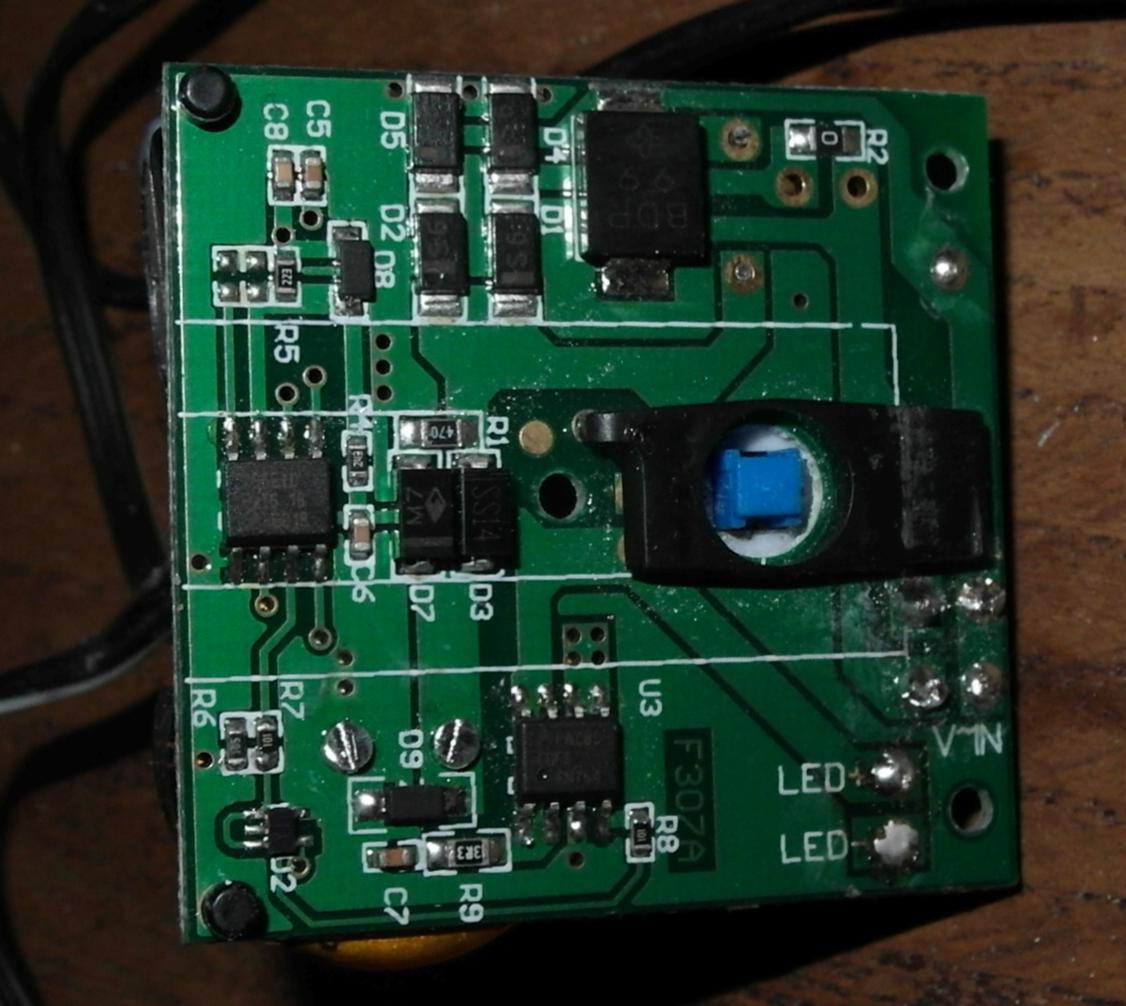
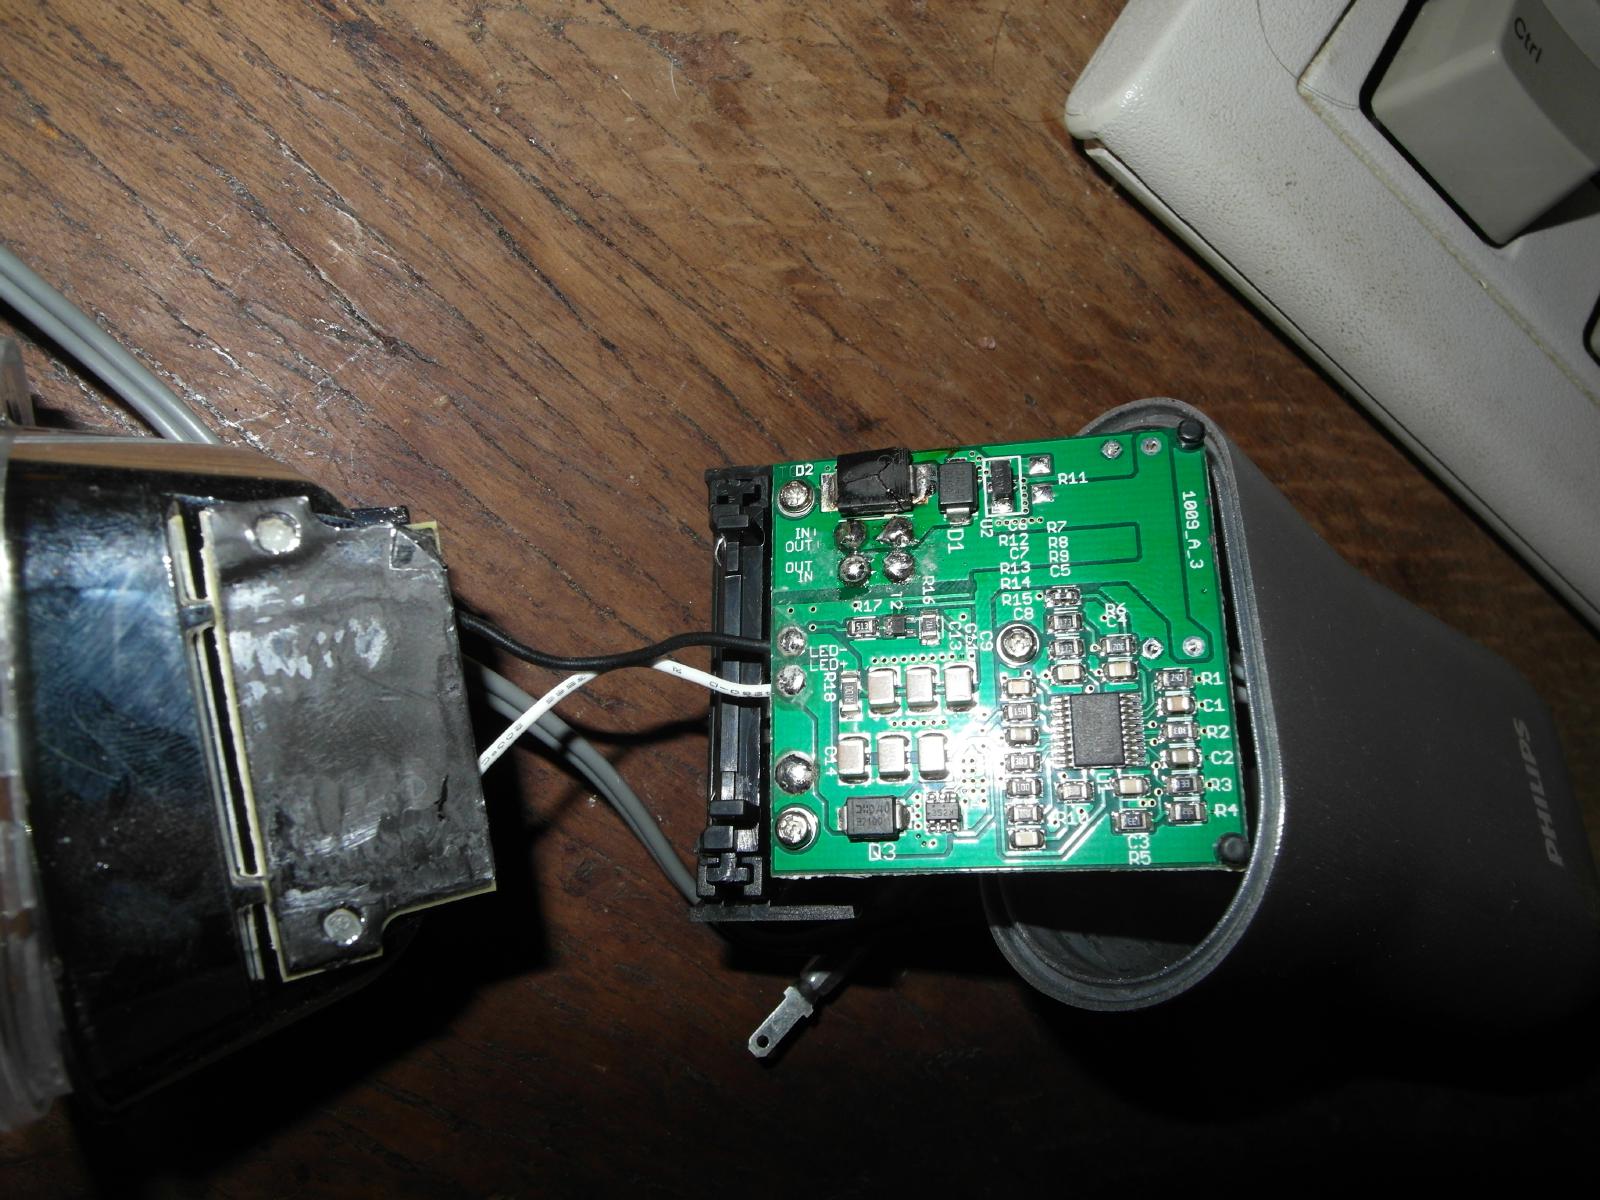
The housing is completely full, with some electronics, the on/off switch, standlight capacitor, 4700µF smoothing capacitor, cable strain relief and on top a piece of plastic with springs that push against the bottom plastic with the PCB (the PCB has some plastic pins to prevent it making contact with the housing) which make it such that the electronics are always tight within the housing even though they are simply pushed in with the lens/front glass assembly. There are a few (stainless? need to check) mini nylock nuts held in the plastic into which the bolts for the mount on the bottom are screwed. I had to saw a bit more off the top to be able to get at 2 screws on top for some more disassembly, but for even more disassembly and removal of the plastic stuff that you still see would require further cutting of the housing. I kept it because now I can still screw on the mount on the bottom.
I think the method of the springs with plastic holder which pushes on the housing on one side and the PCB with a few plastic spacers on the other side, is rather a complicated system. I would much prefer a housing that can be properly opened and which has some mounts for screws so a PCB can be bolted onto it. This would make the lamp user serviceable and would not require such a complicated design.
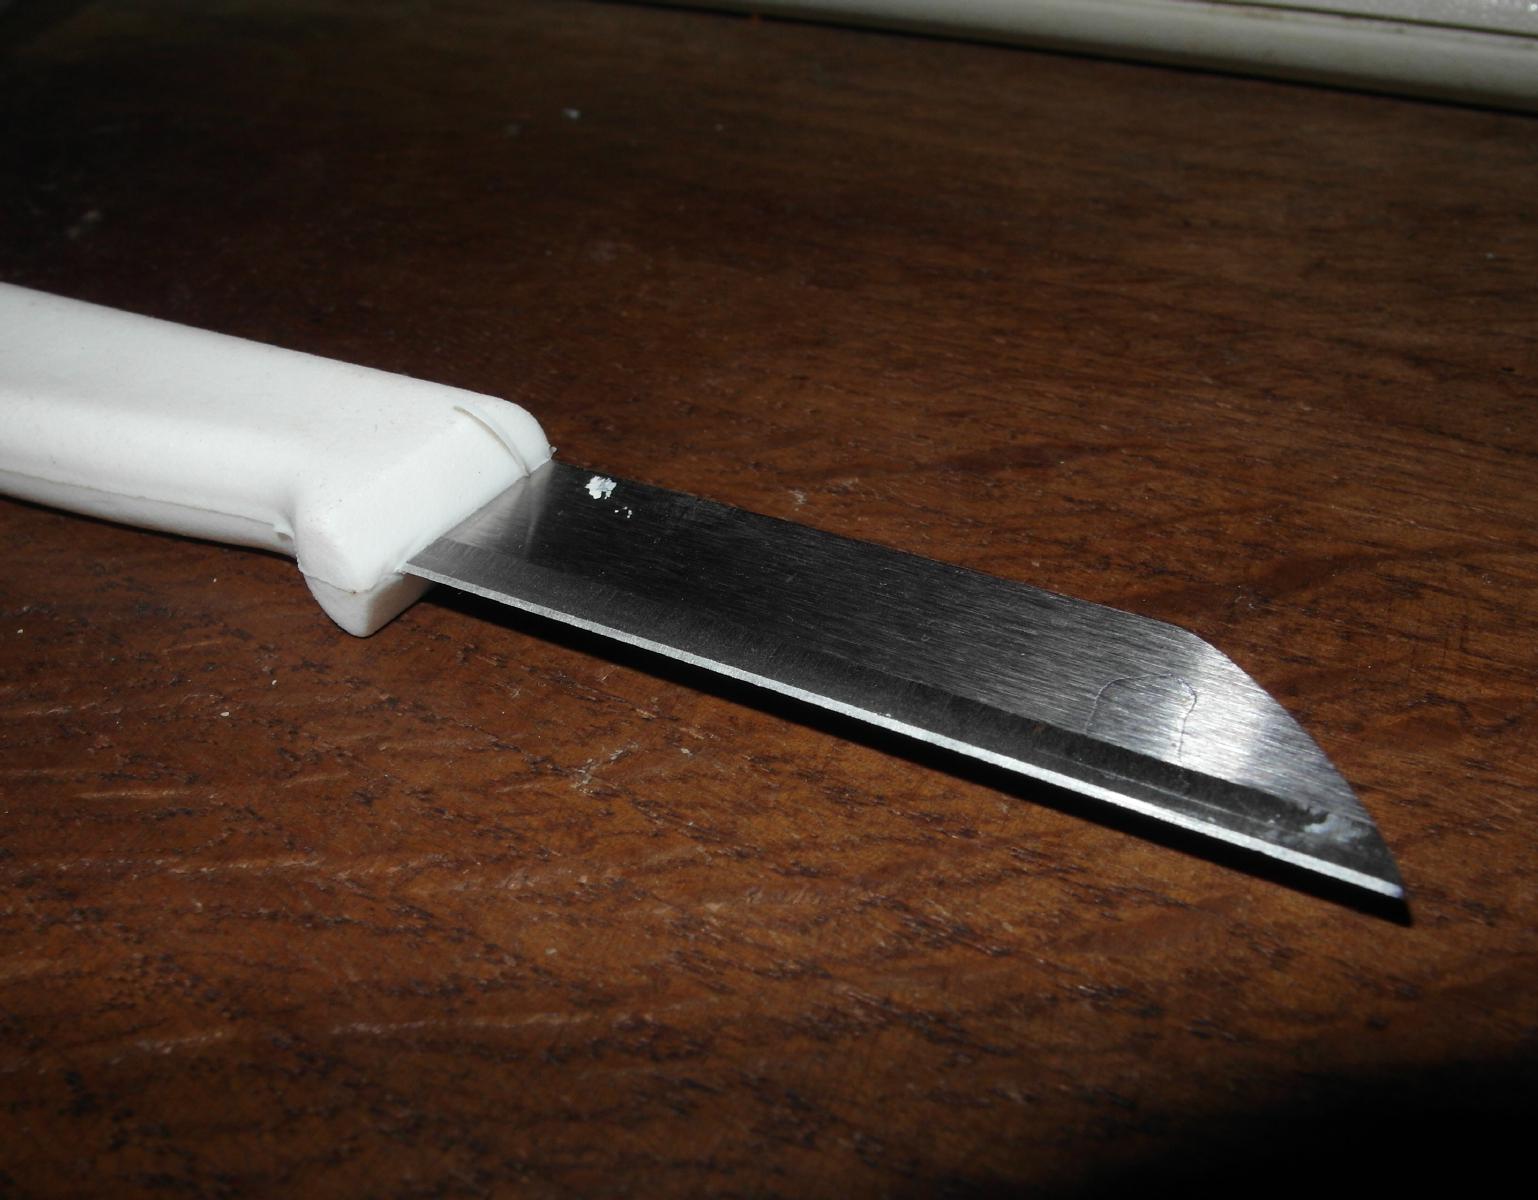
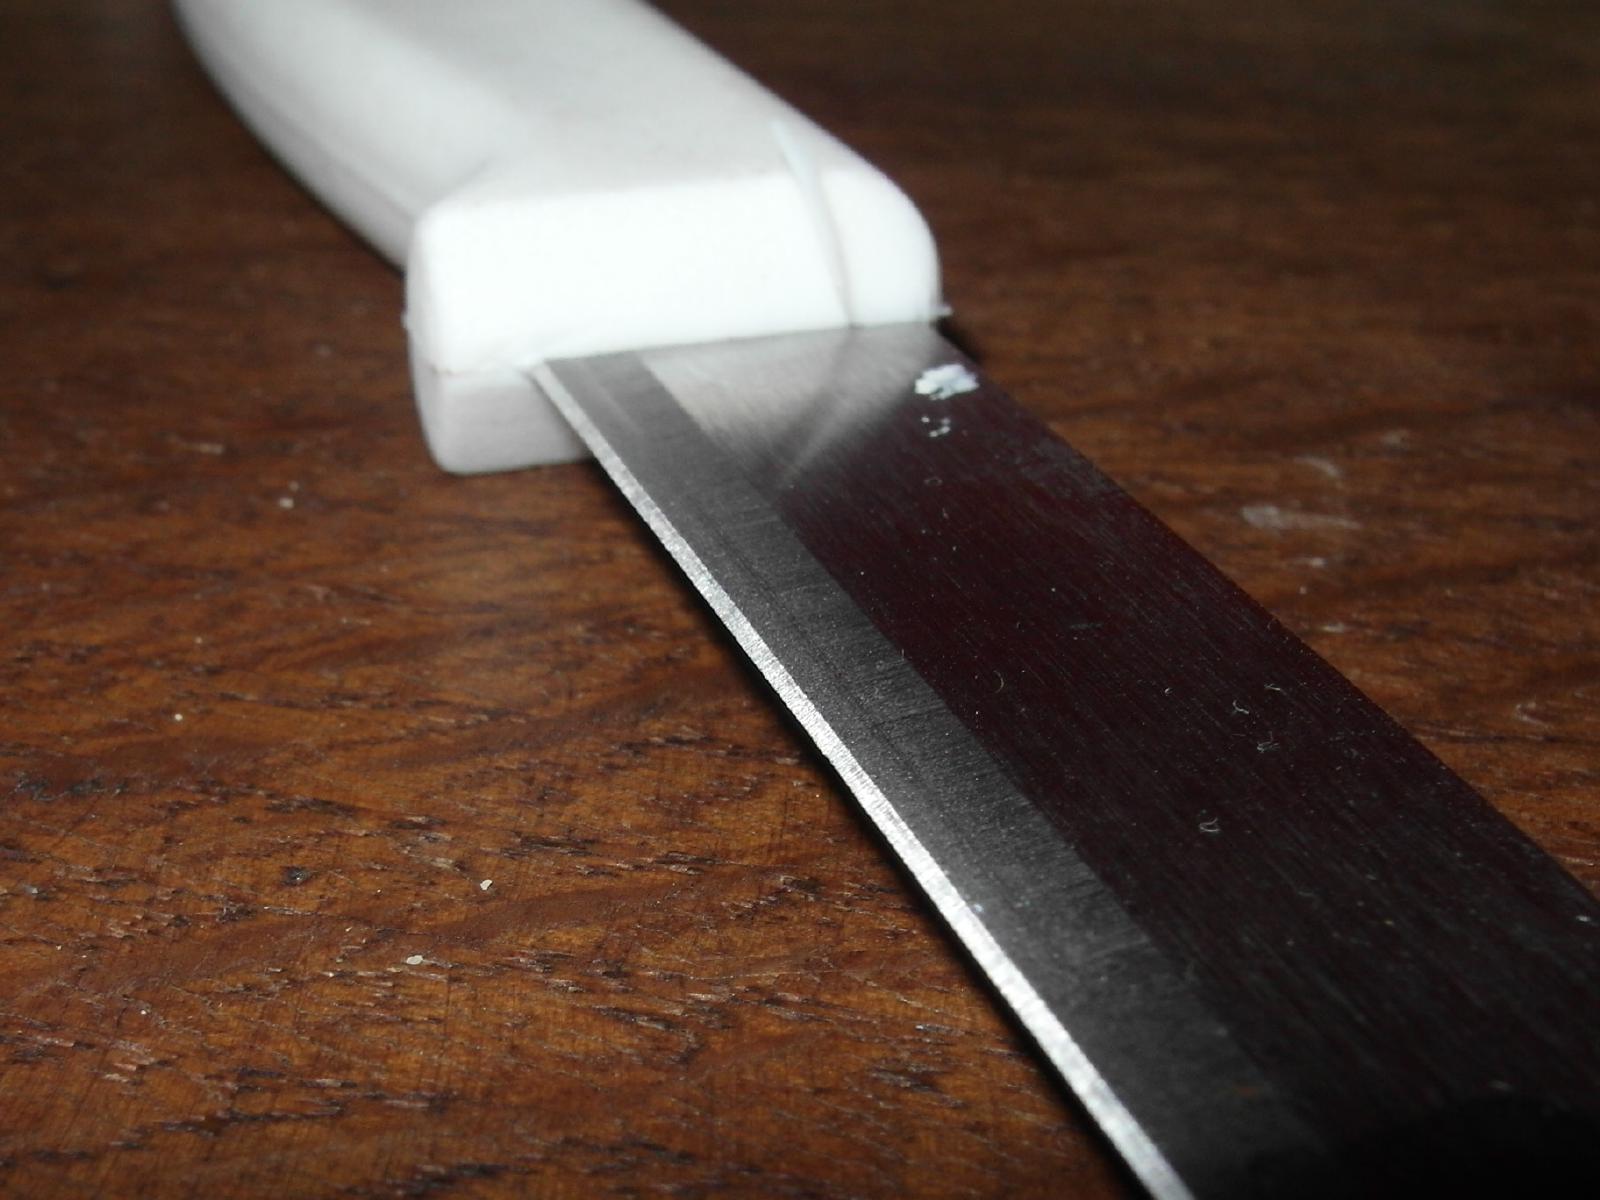
This can be done by taking a sharp kitchen knife, see the pictures for a knife type that works well: The sharp edge means you can stick it in the slight opening between aluminium housing and plastic lens, the knife getting wider means you're driving a wedge between them. By working your way around the lens you can get it loose, then take out the reflector, LEDs, then the electronics etc. I have made pictures of this procedure with a defective Pedelec 80 headlamp. This method keeps the housing intact but the LEDs come loose from it so the PCB with the LEDs needs to be fixed with thermal glue after that, or you can use the separate piece of plastic again onto which the driver is fastened to press them into place in the housing (= cooling for the LEDs).
Putting it back together, I experimented a bit without the plastic piece inside the lamp, and the cutoff was not as sharp as originally, when the LEDs were pushed up more by the reflector which was pushed up by the separate piece + driver in the original lamp (automatically, because of its construction, similar to the Saferide 60). So you need some care in putting it back together when not using all the pieces :)
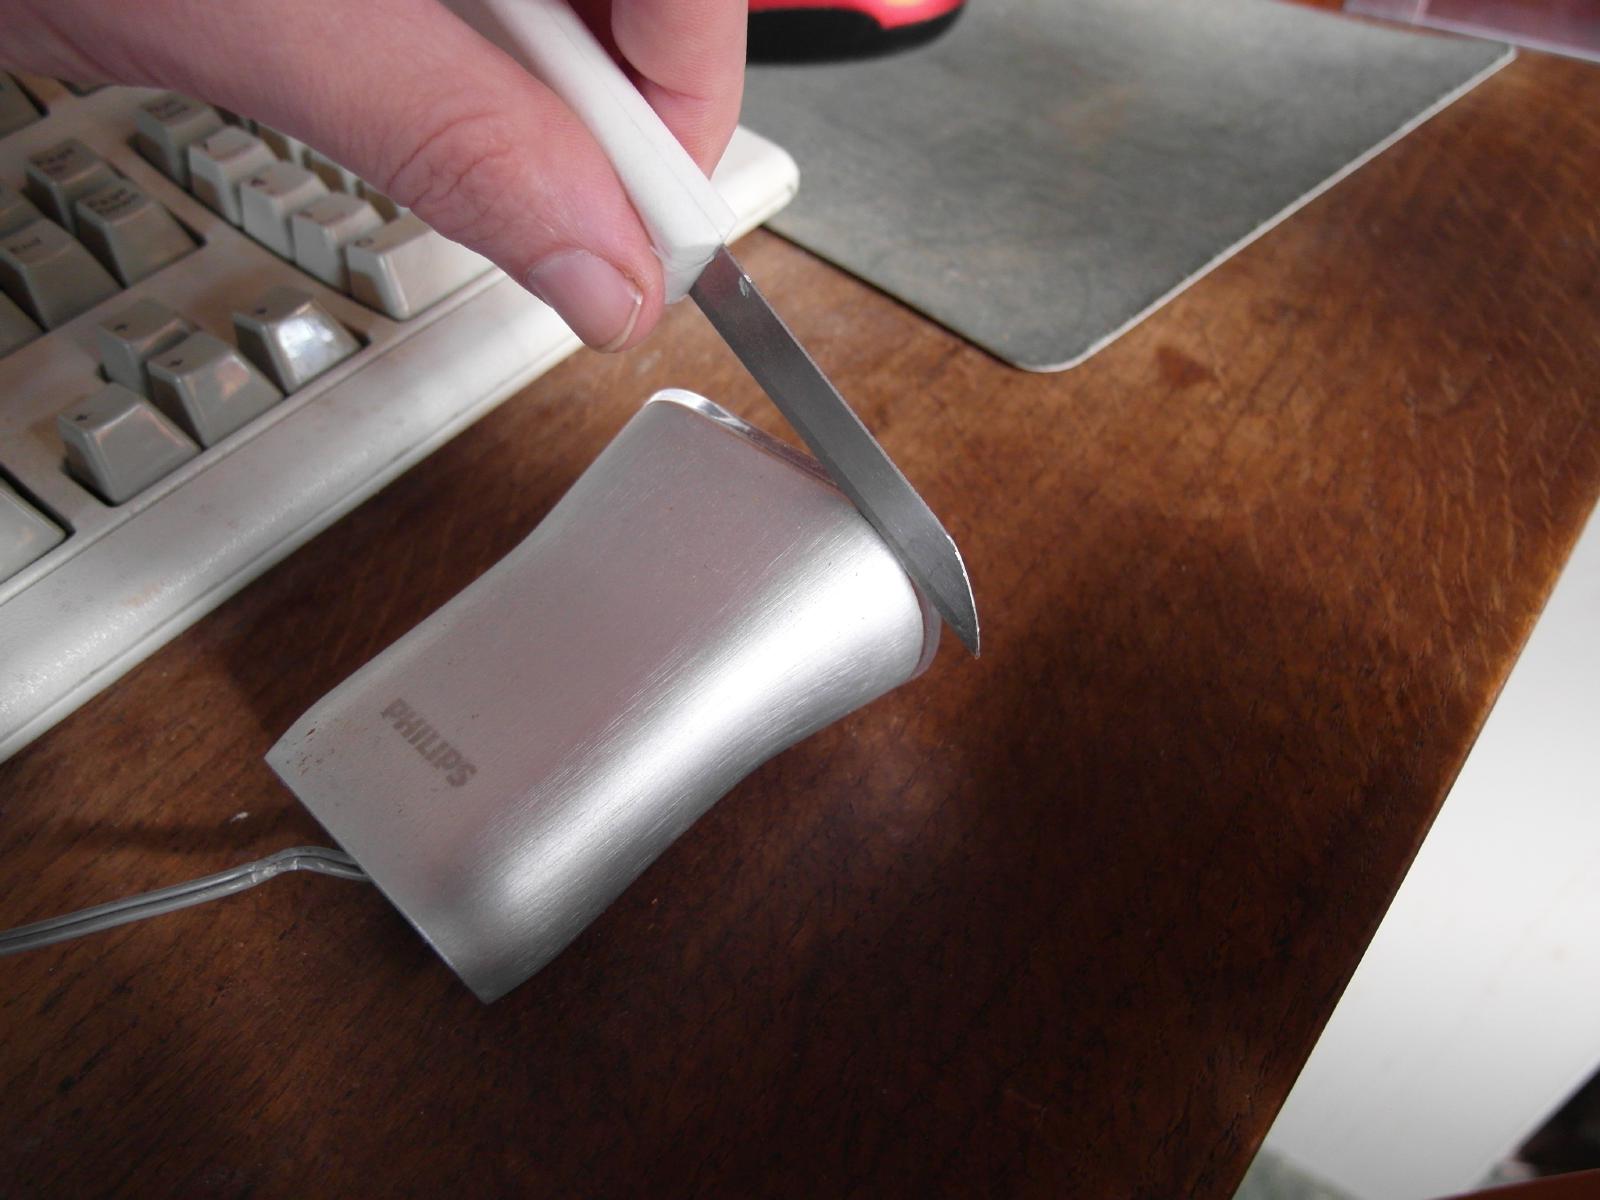

Note that this method did not work for me on the Saferide 40-battery. This is because the housing of that lamp is made from plastic. With metal housing, the knife uses the housing to press away the lens and this doesn't work in that case due to the deformation of the plastic.
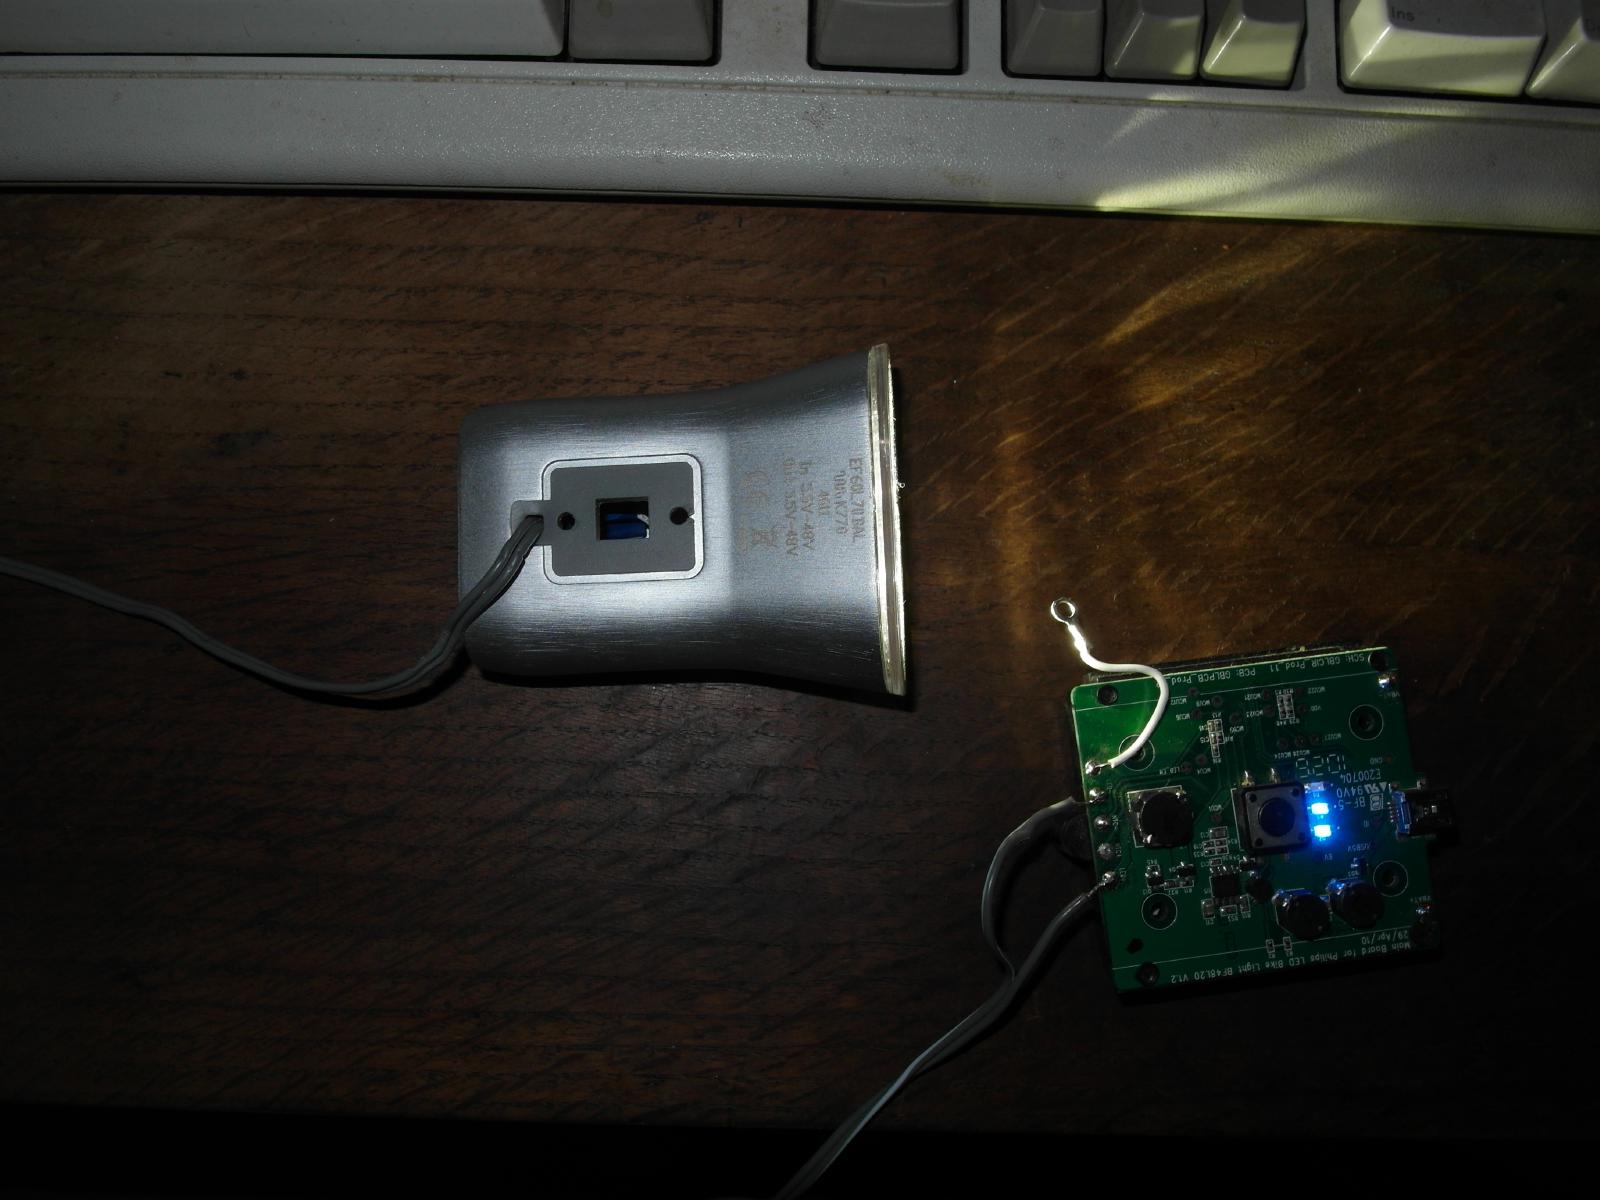
The reason for this modification is that I read that someone on a German forum for recumbents (or was it pedelecs?) preferred the SLD to the LBL when running the SLD from a 7.85V (the SLD can be used on DC with maximally 8.0V, above that the SLD will get damaged). I tried that as well with a variable voltage generator and pointed the SLD-7.85V at the wall to compare it with the LBL and the beam does look brighter in the top-middle, so it might be brighter at long distance. To properly test in what respect the SLD's beam is better than that of the LBL I made the following modification to run the LEDs in the SLD with the same current as in the LBL:

I'm also going to try a h6flex or similar and run it at 1A...
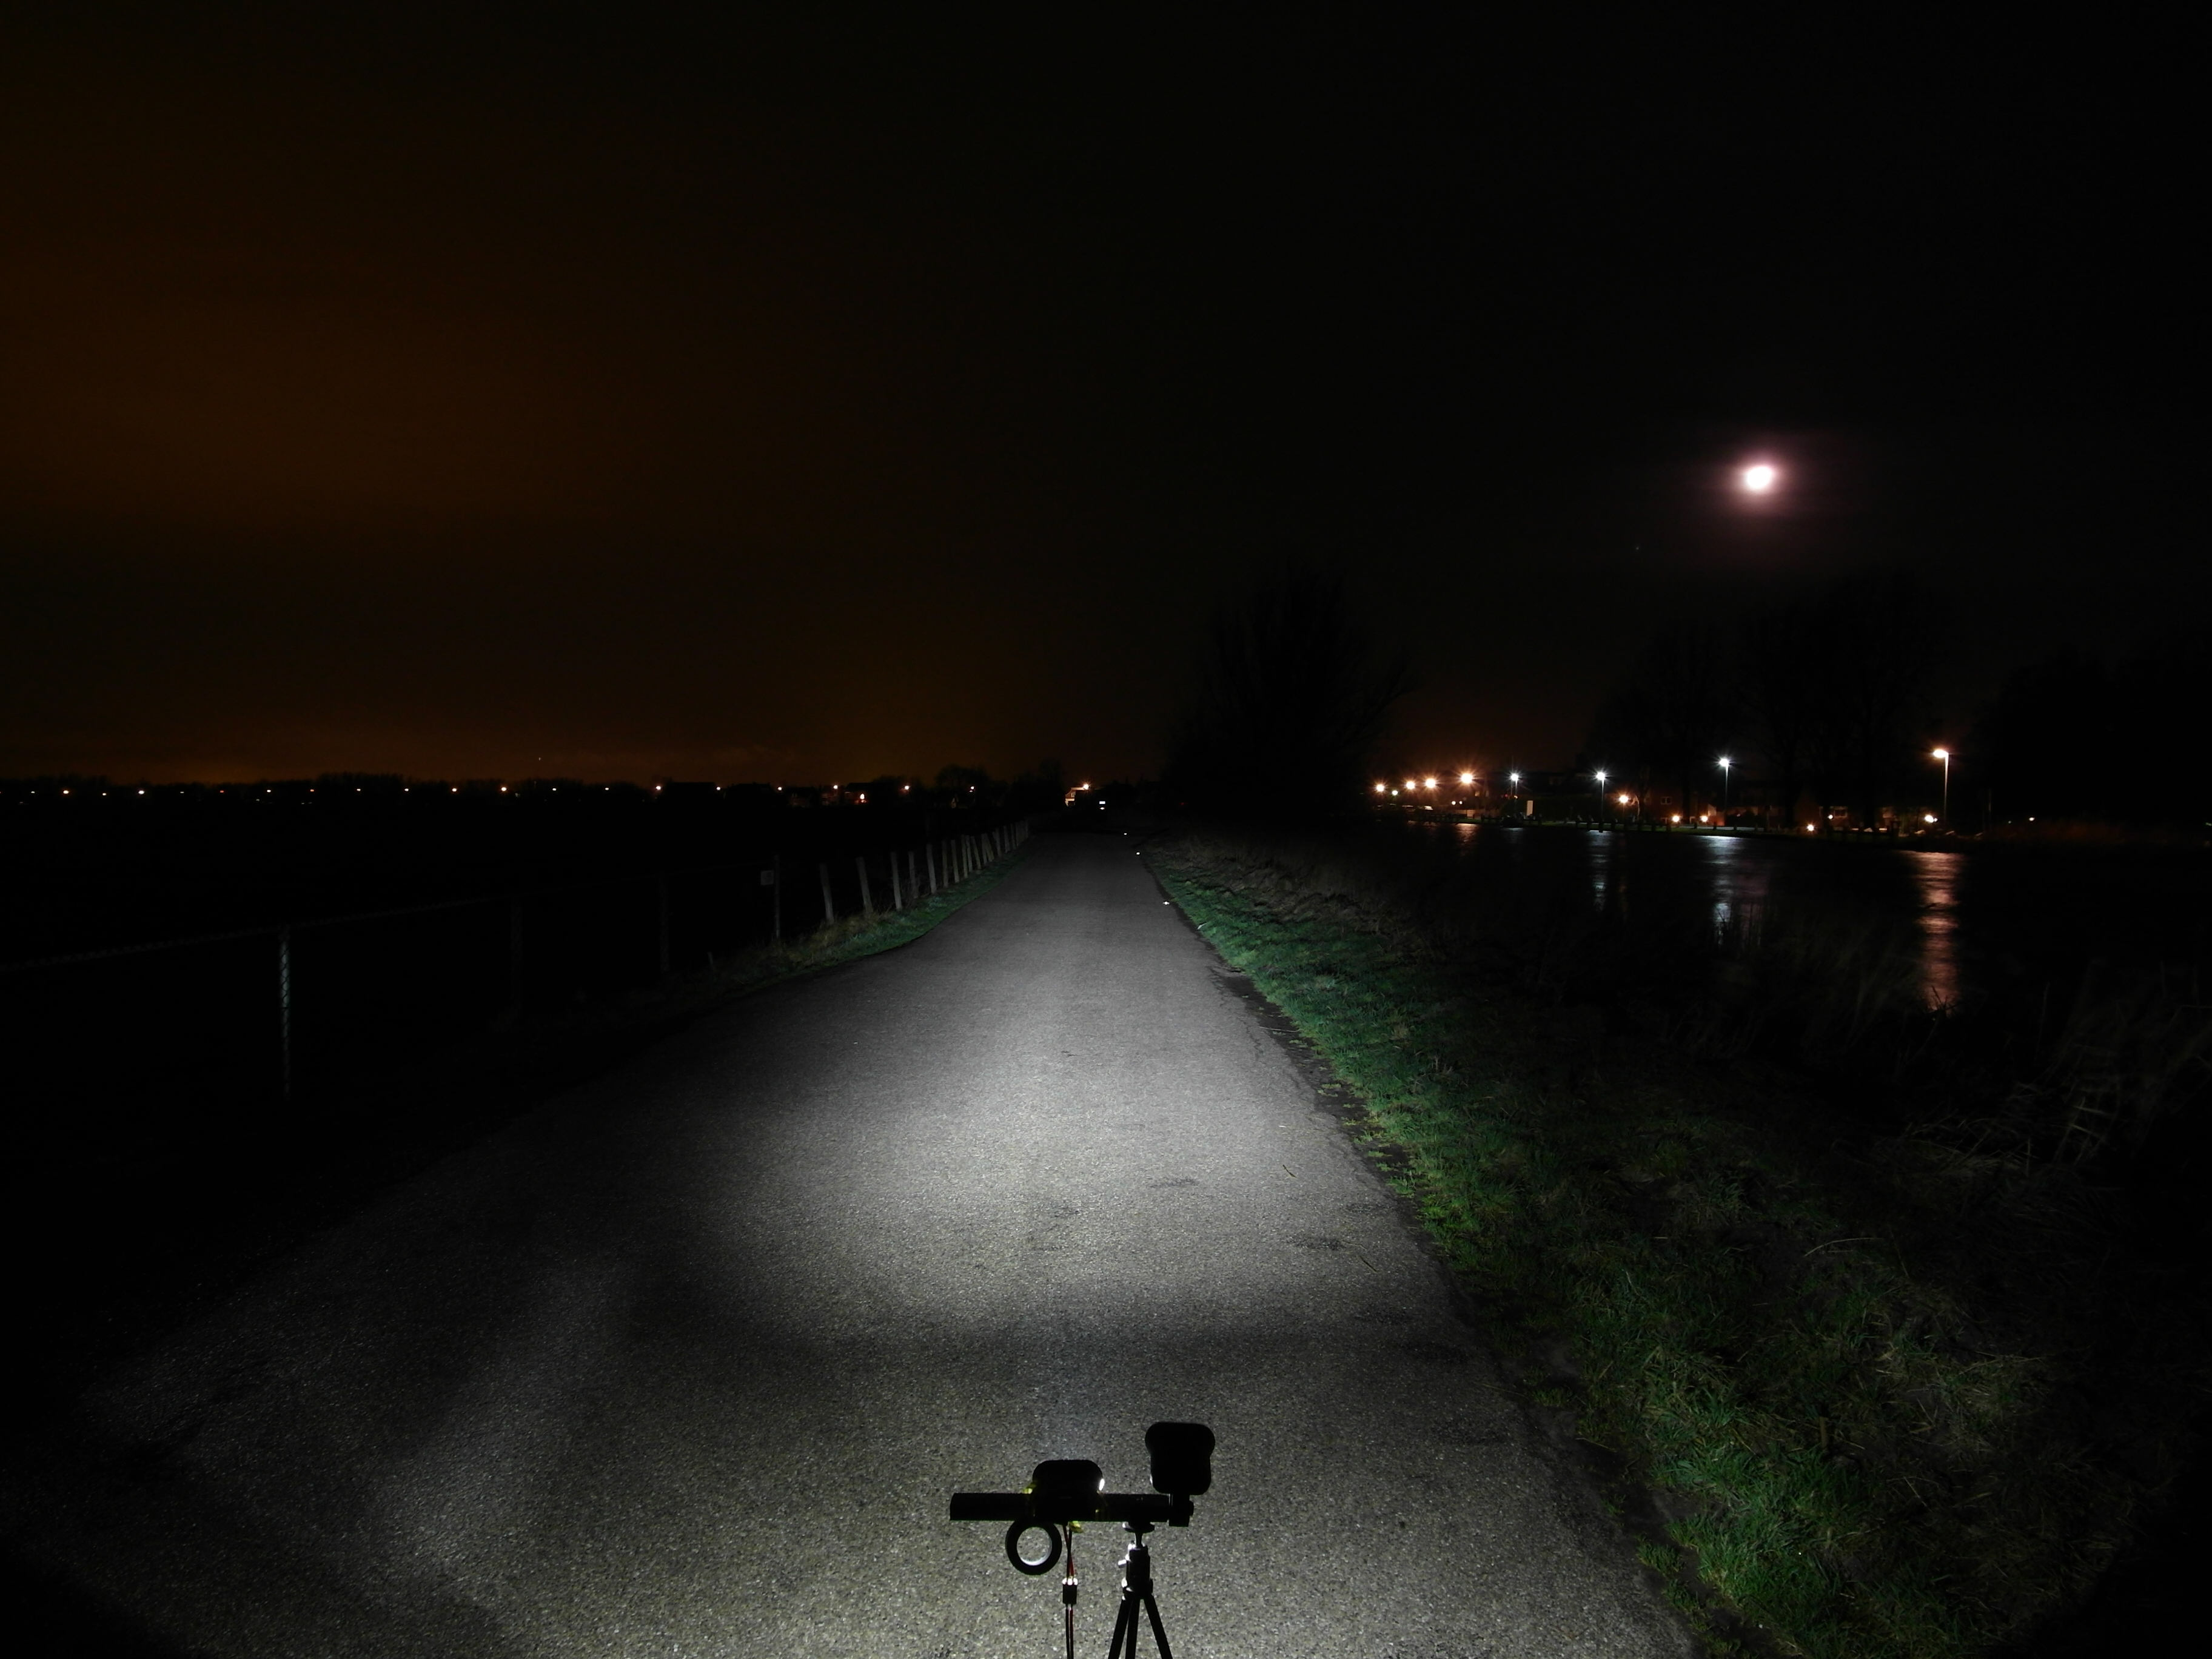
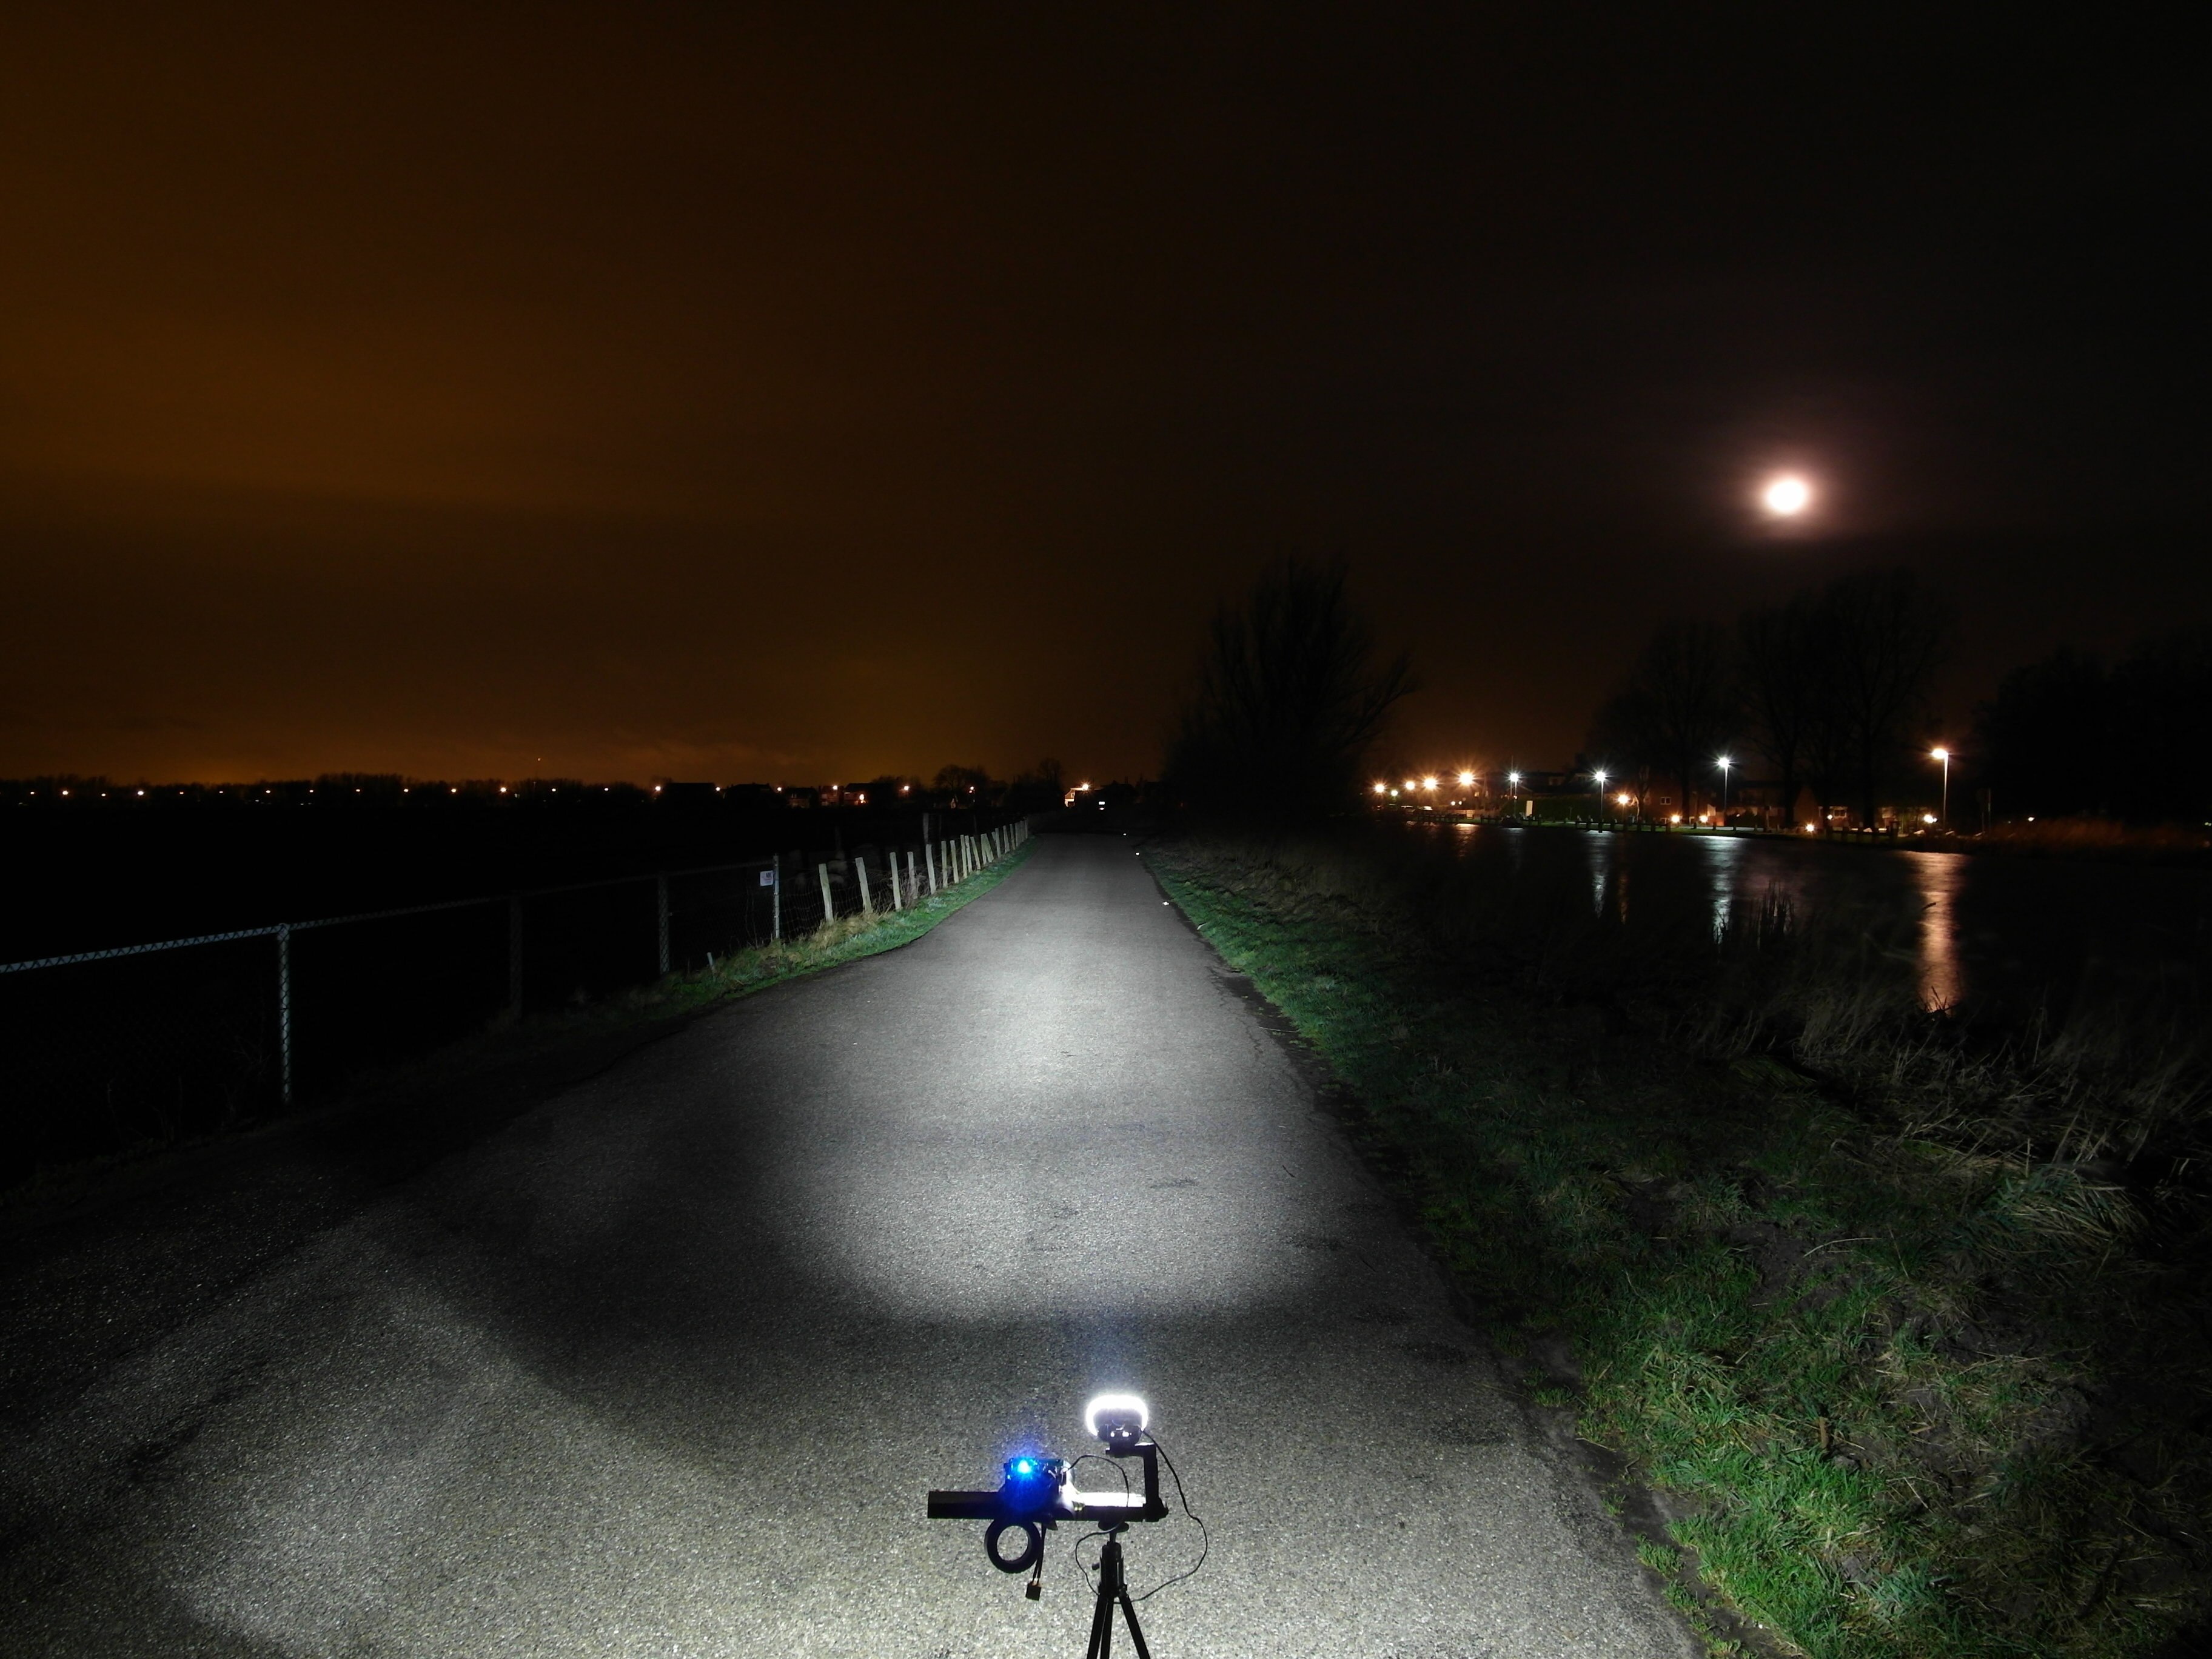
Fairly strong wind which made aiming the lamps difficult. The wind was so strong I was simply glad the setup didn't fall over... Camera settings: F3.4, ISO80, exposure time 4s or 8s.
Philips LED bike light standard (ILED=0.70A) |
|
1.05m, 4s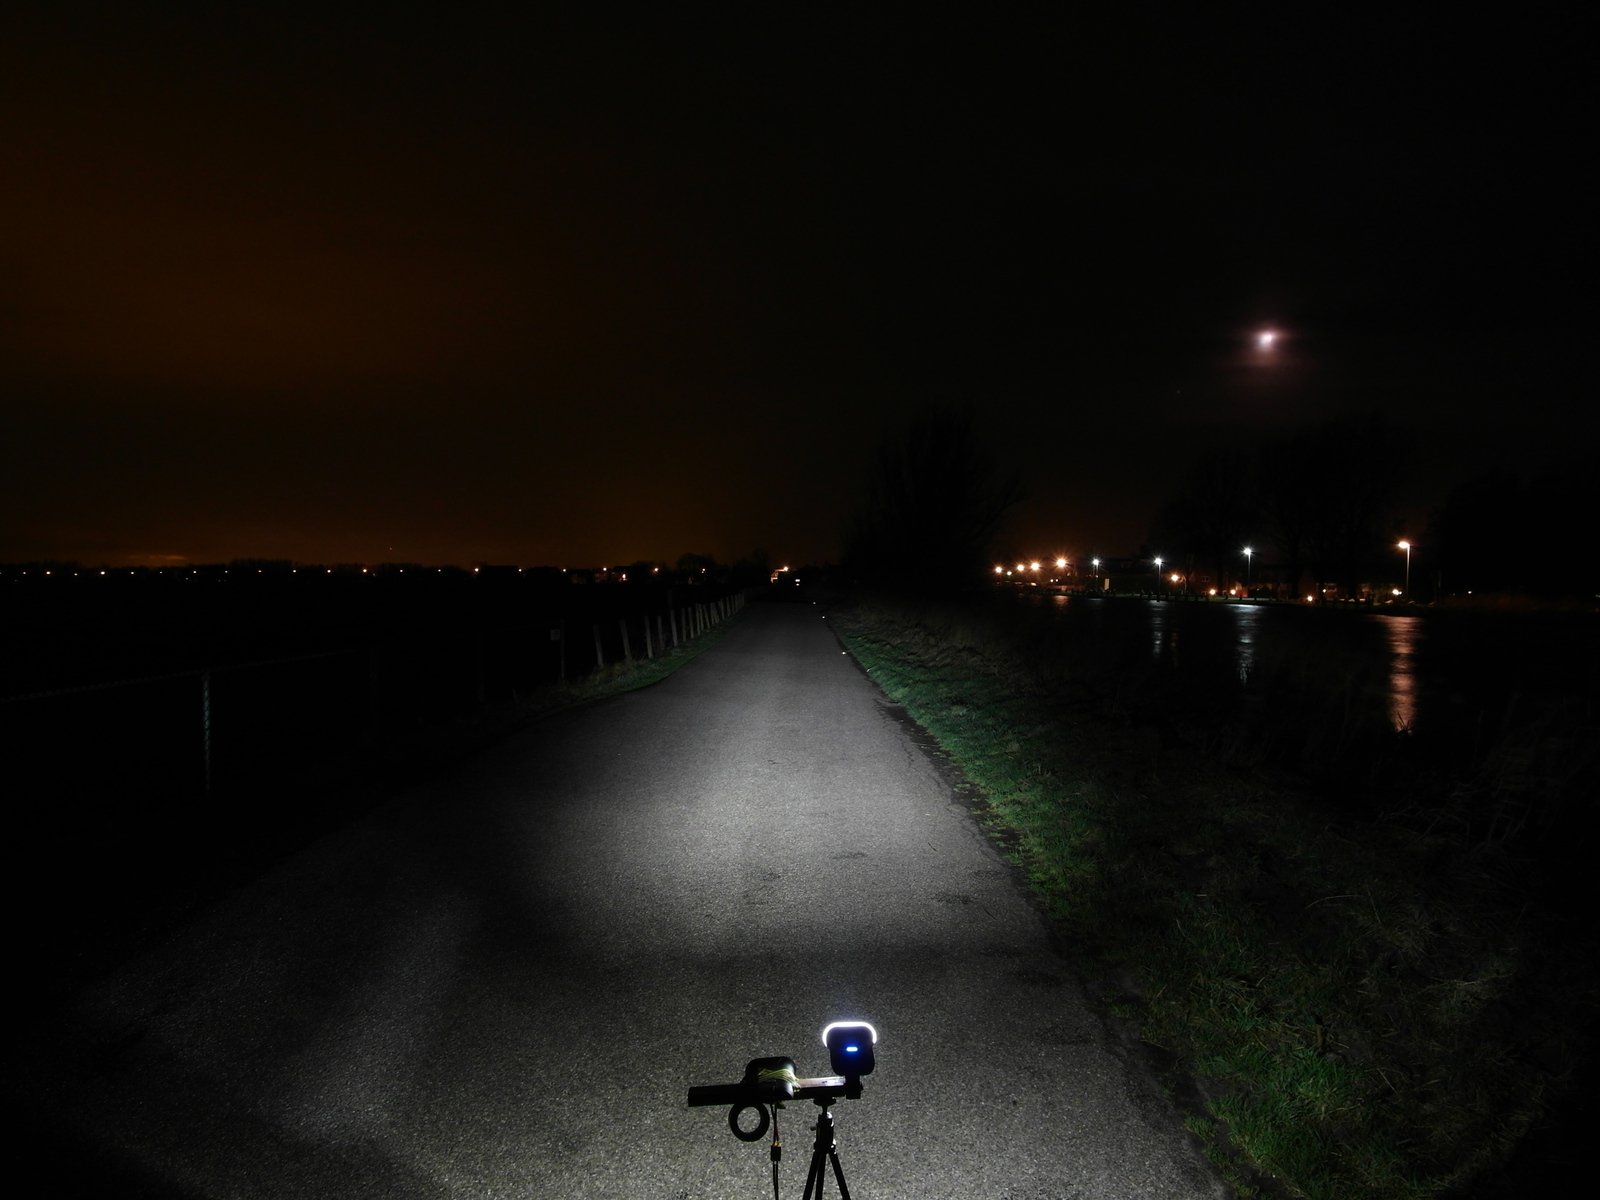 Camera: h=1.65, d=-1.00, aim=50m
(Original 10 Mp) |
1.05m, 8s Camera: h=1.65, d=-1.00, aim=50m
(Original 10 Mp) |
Philips LED bike light using h6flex (ILED=0.92A) |
|
1.05m, 4s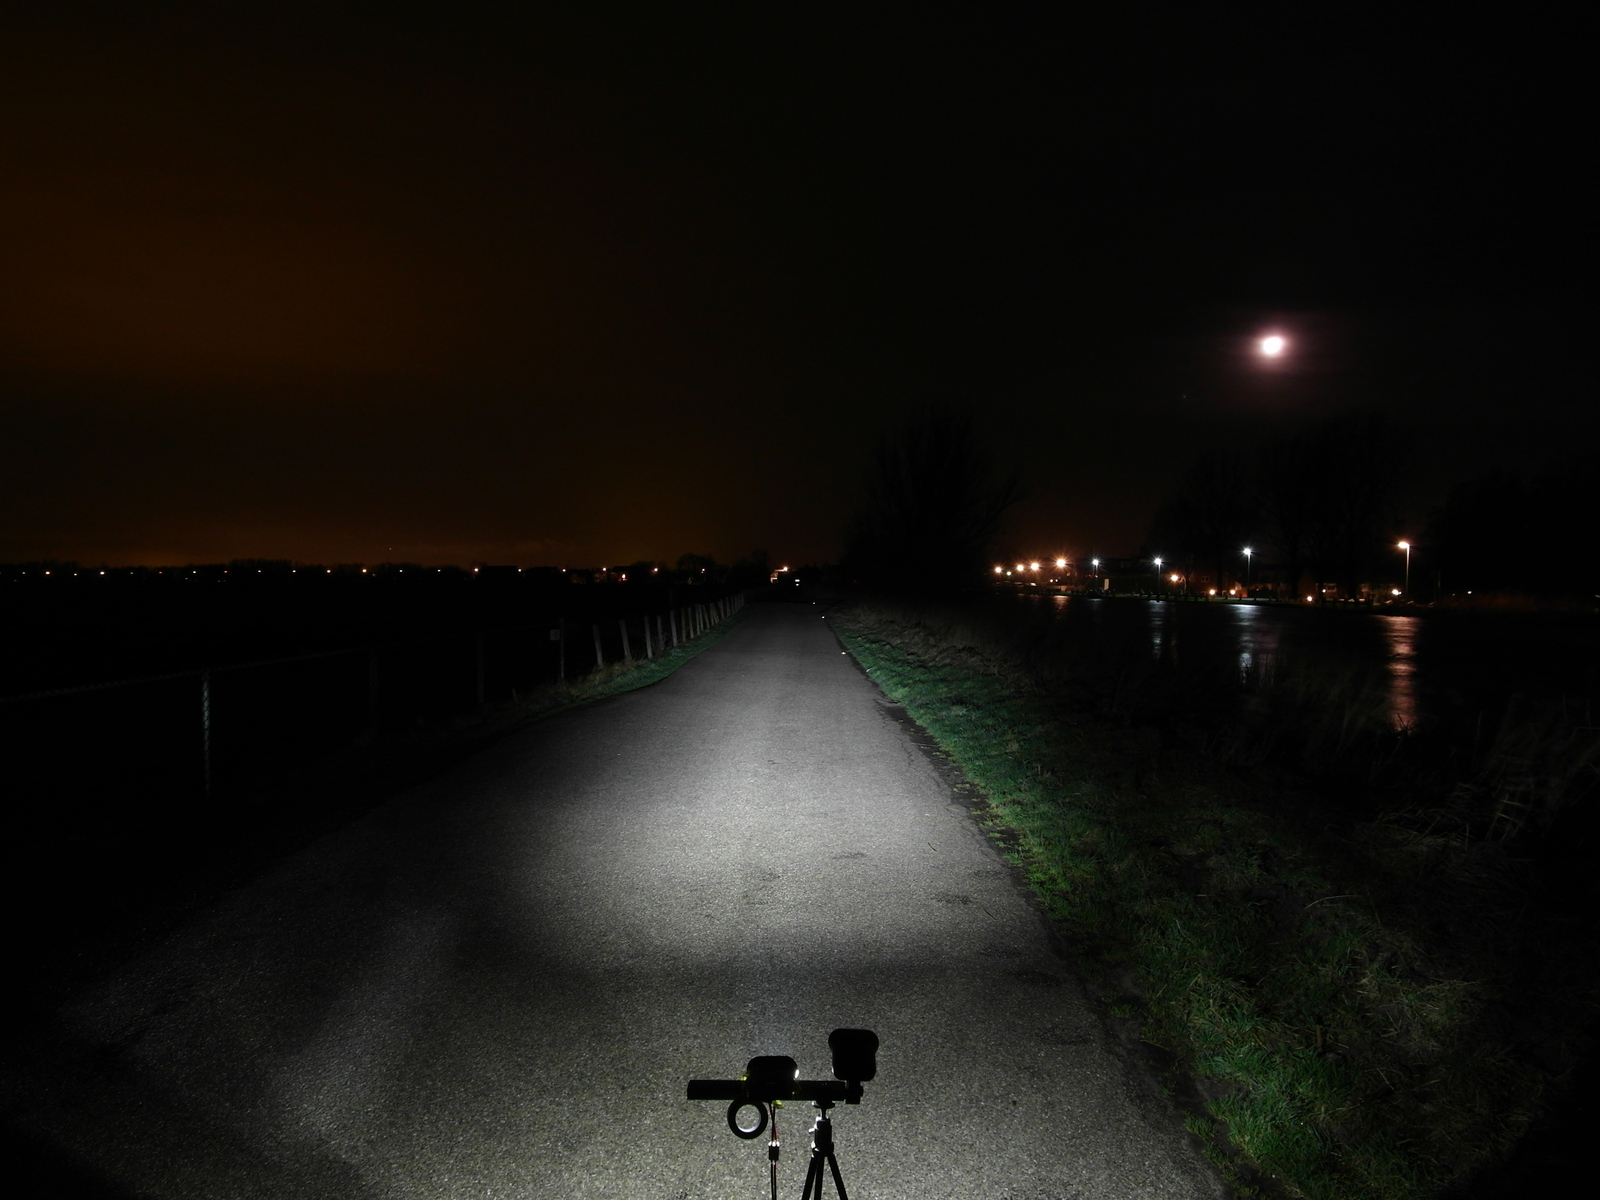 Camera: h=1.65, d=-1.00, aim=50m
(Original 10 Mp) |
1.05m, 8s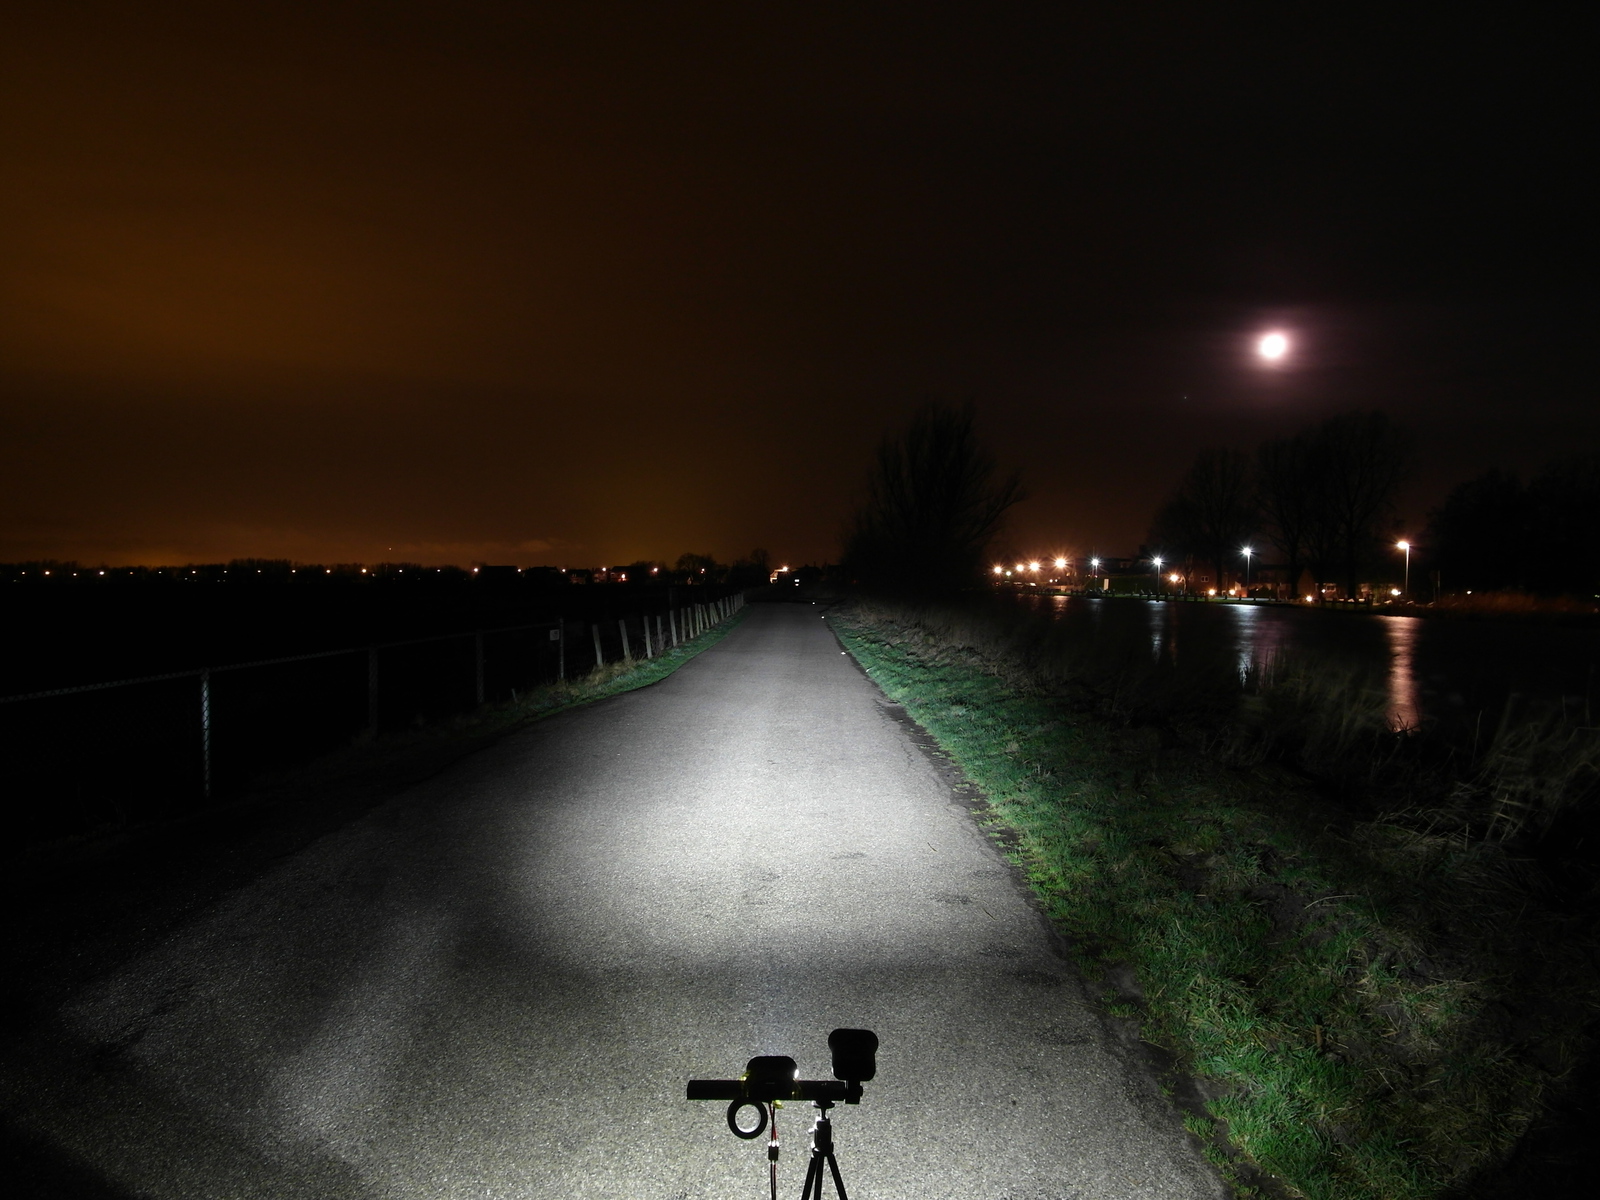 Camera: h=1.65, d=-1.00, aim=50m
(Original 10 Mp) |
Philips Saferide 60 modified to run with the LBL's driver (ILED=0.70A) |
|
1.05m, 4s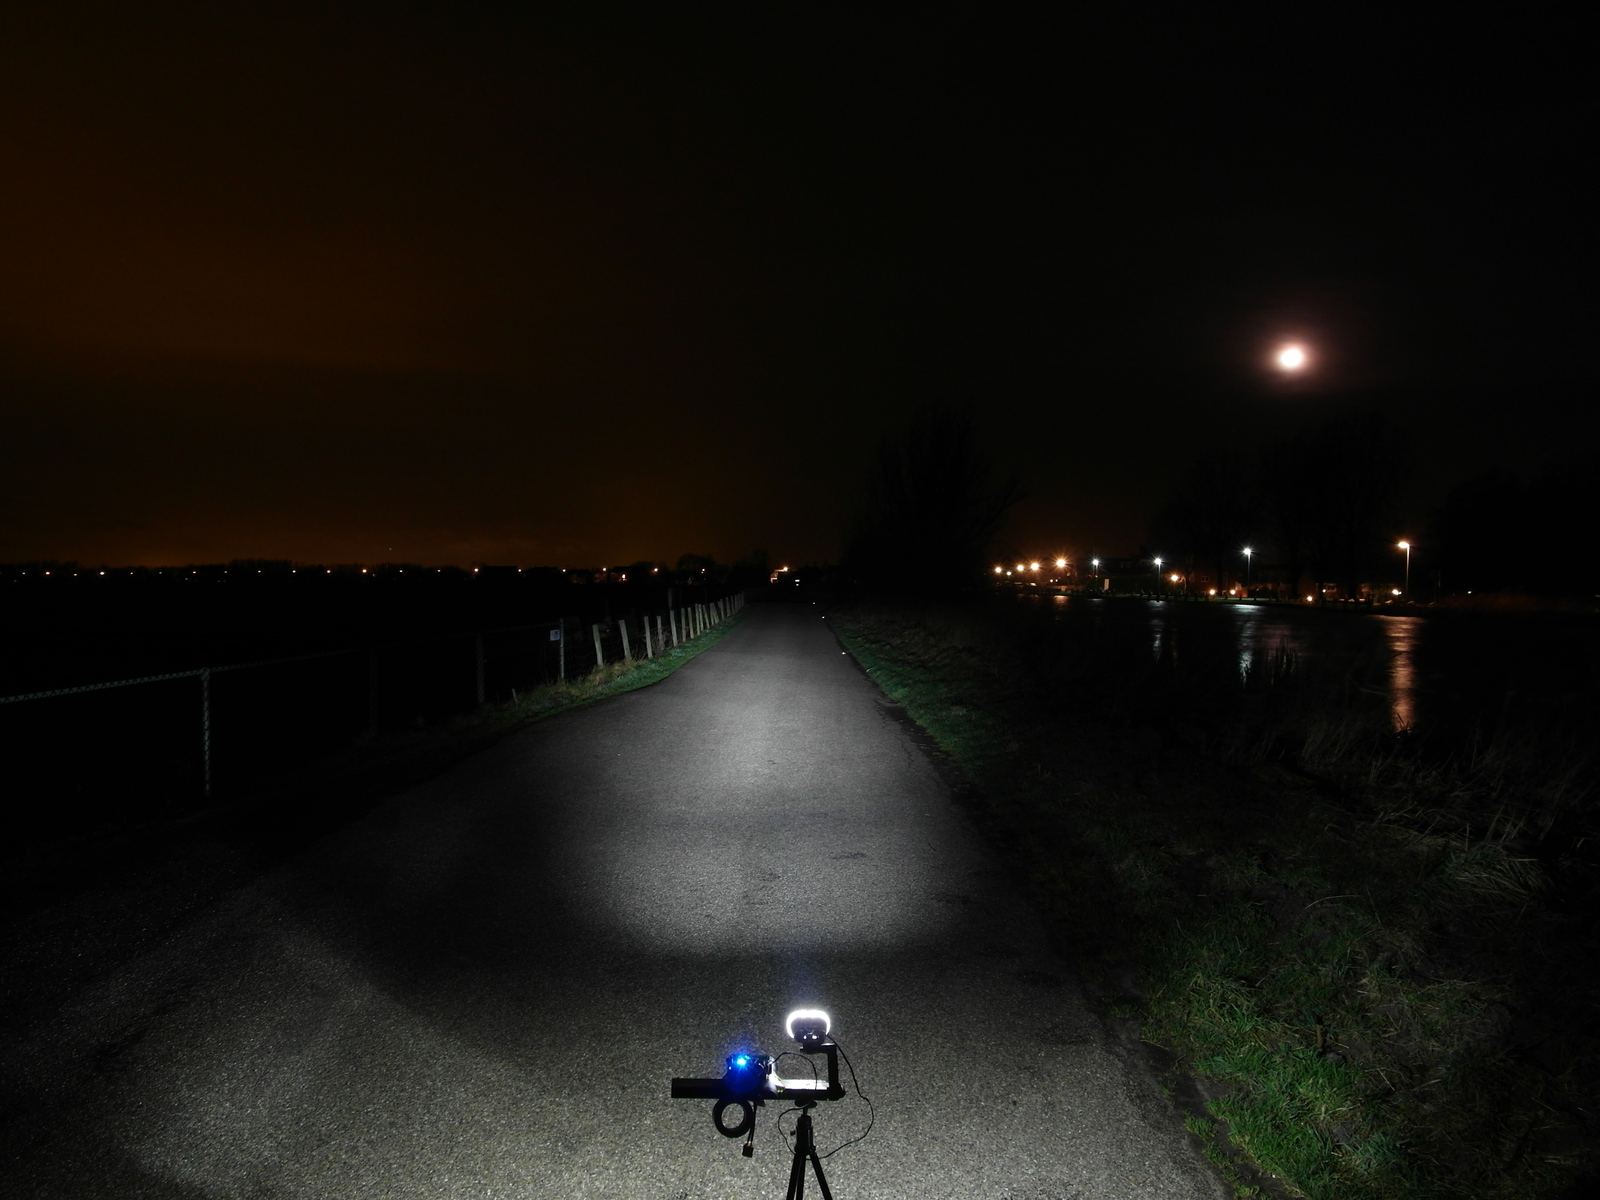 Camera: h=1.65, d=-1.00, aim=50m
(Original 10 Mp) |
1.05m, 8s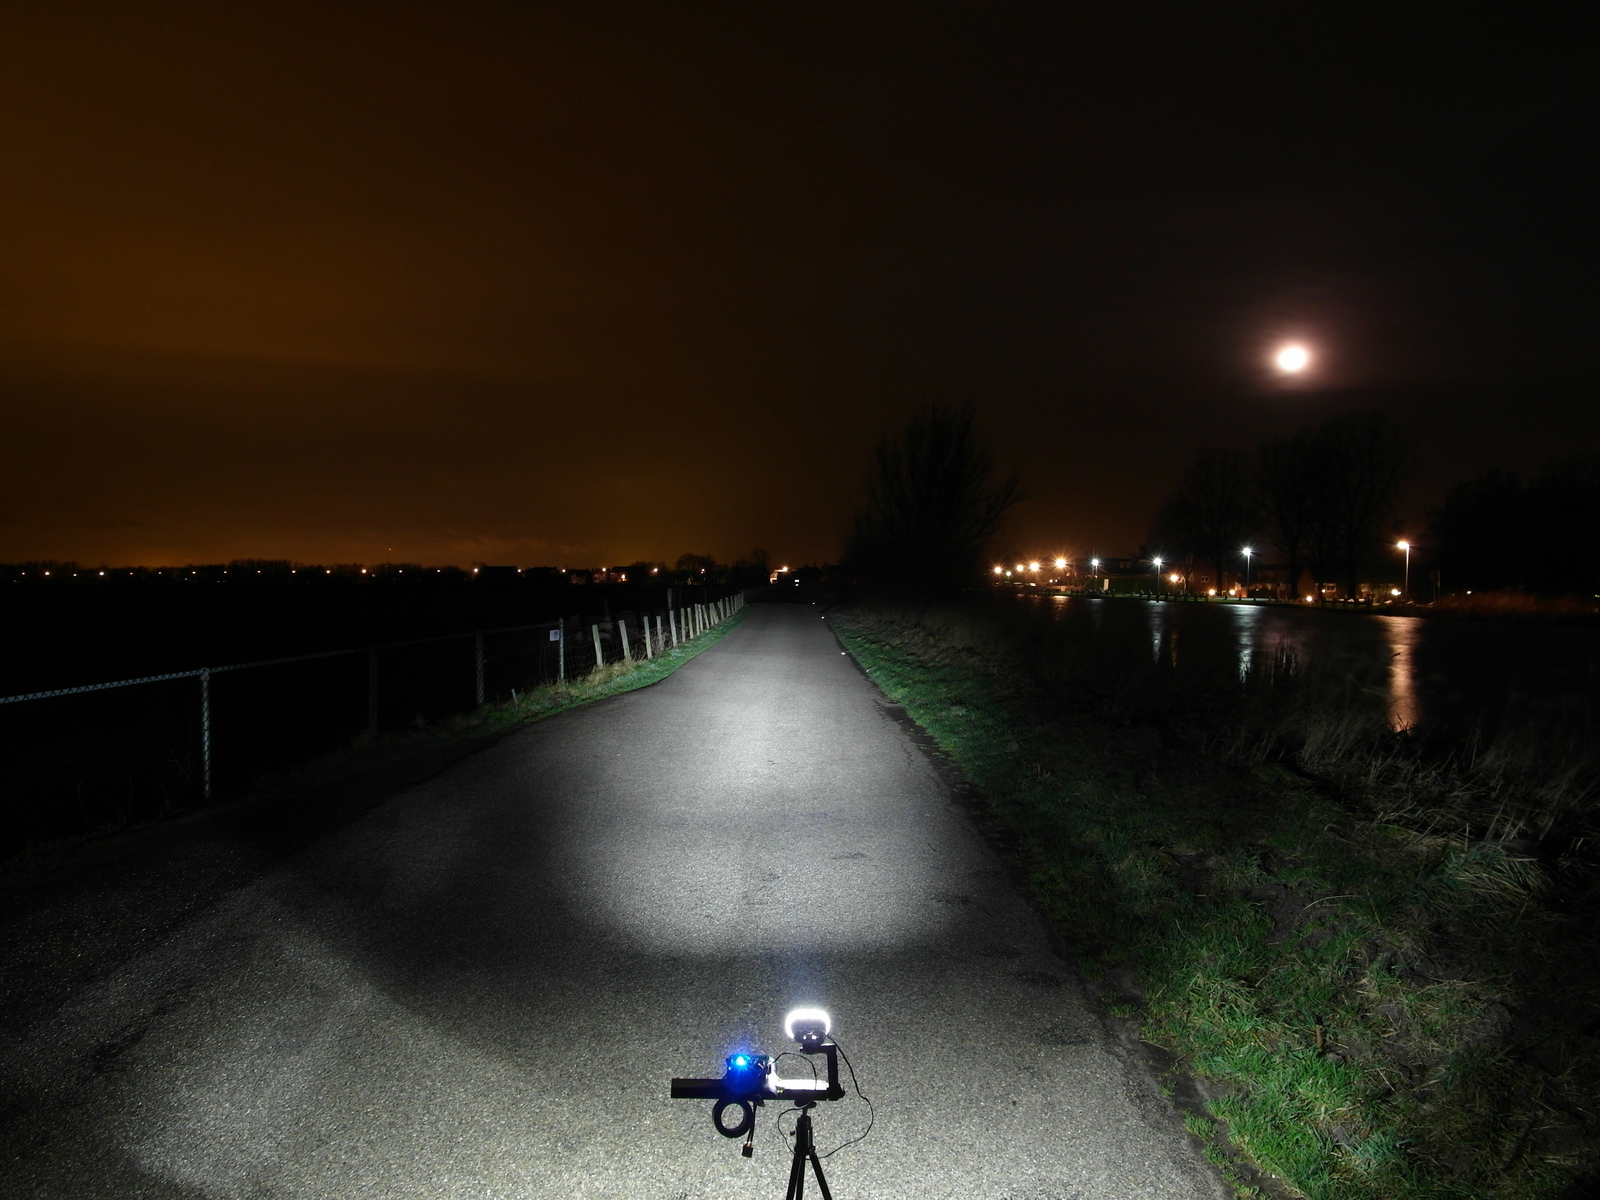 Camera: h=1.65, d=-1.00, aim=50m
(Original 10 Mp) |
The SLD and LBL are aimed not quite the same, so I suppose it means I should remake the beamshots, but it seems the SLD-0.70 A is a bit stronger at long distance than the LBL which puts out the light more in a wider and more even beam. The slight overexposure of the near field remains with the SLD although mounting it at handlebar height already lessens this. The main difference appears to be that the SLD-0.70A's beam is narrower and not as even close to the bike. I need to do a ride with both lamps on my bike to properly compare the SLD-0.70A vs. LBL at 0.70A.
A ride on road 4 (dark smooth asphalt, road with cars next to it) with the LBL and SLD-0.70A showed that there is not much difference. The SLD-0.70A may have a bit more light at 50-70m but there's not enough difference to make me prefer 'supercharged' SLD, on the contrary, the other disadvantages of the SLD remain, in particular that the beam is less even en less wide/good especially close to the bike.
To check this result I'm going to do another ride on a different fully dark road.
I think the beamshots of the LBL at 0.92A vs. the LBL at the standard 0.70A show that not much is added with more power. The difference is visible mostly with side by side comparison. So the 0.70A power setting in the LBL is probably chosen just right as more power would give a bit more light but a noticeable shorter runtime. I will do more side by side tests to see if my on-the-bike impressions confirm this view of my impressions of the difference when I made the beamshot pictures above.
| To email me go to the email page |
Last modified: Fri Mar 1 16:15:16 CET 2013